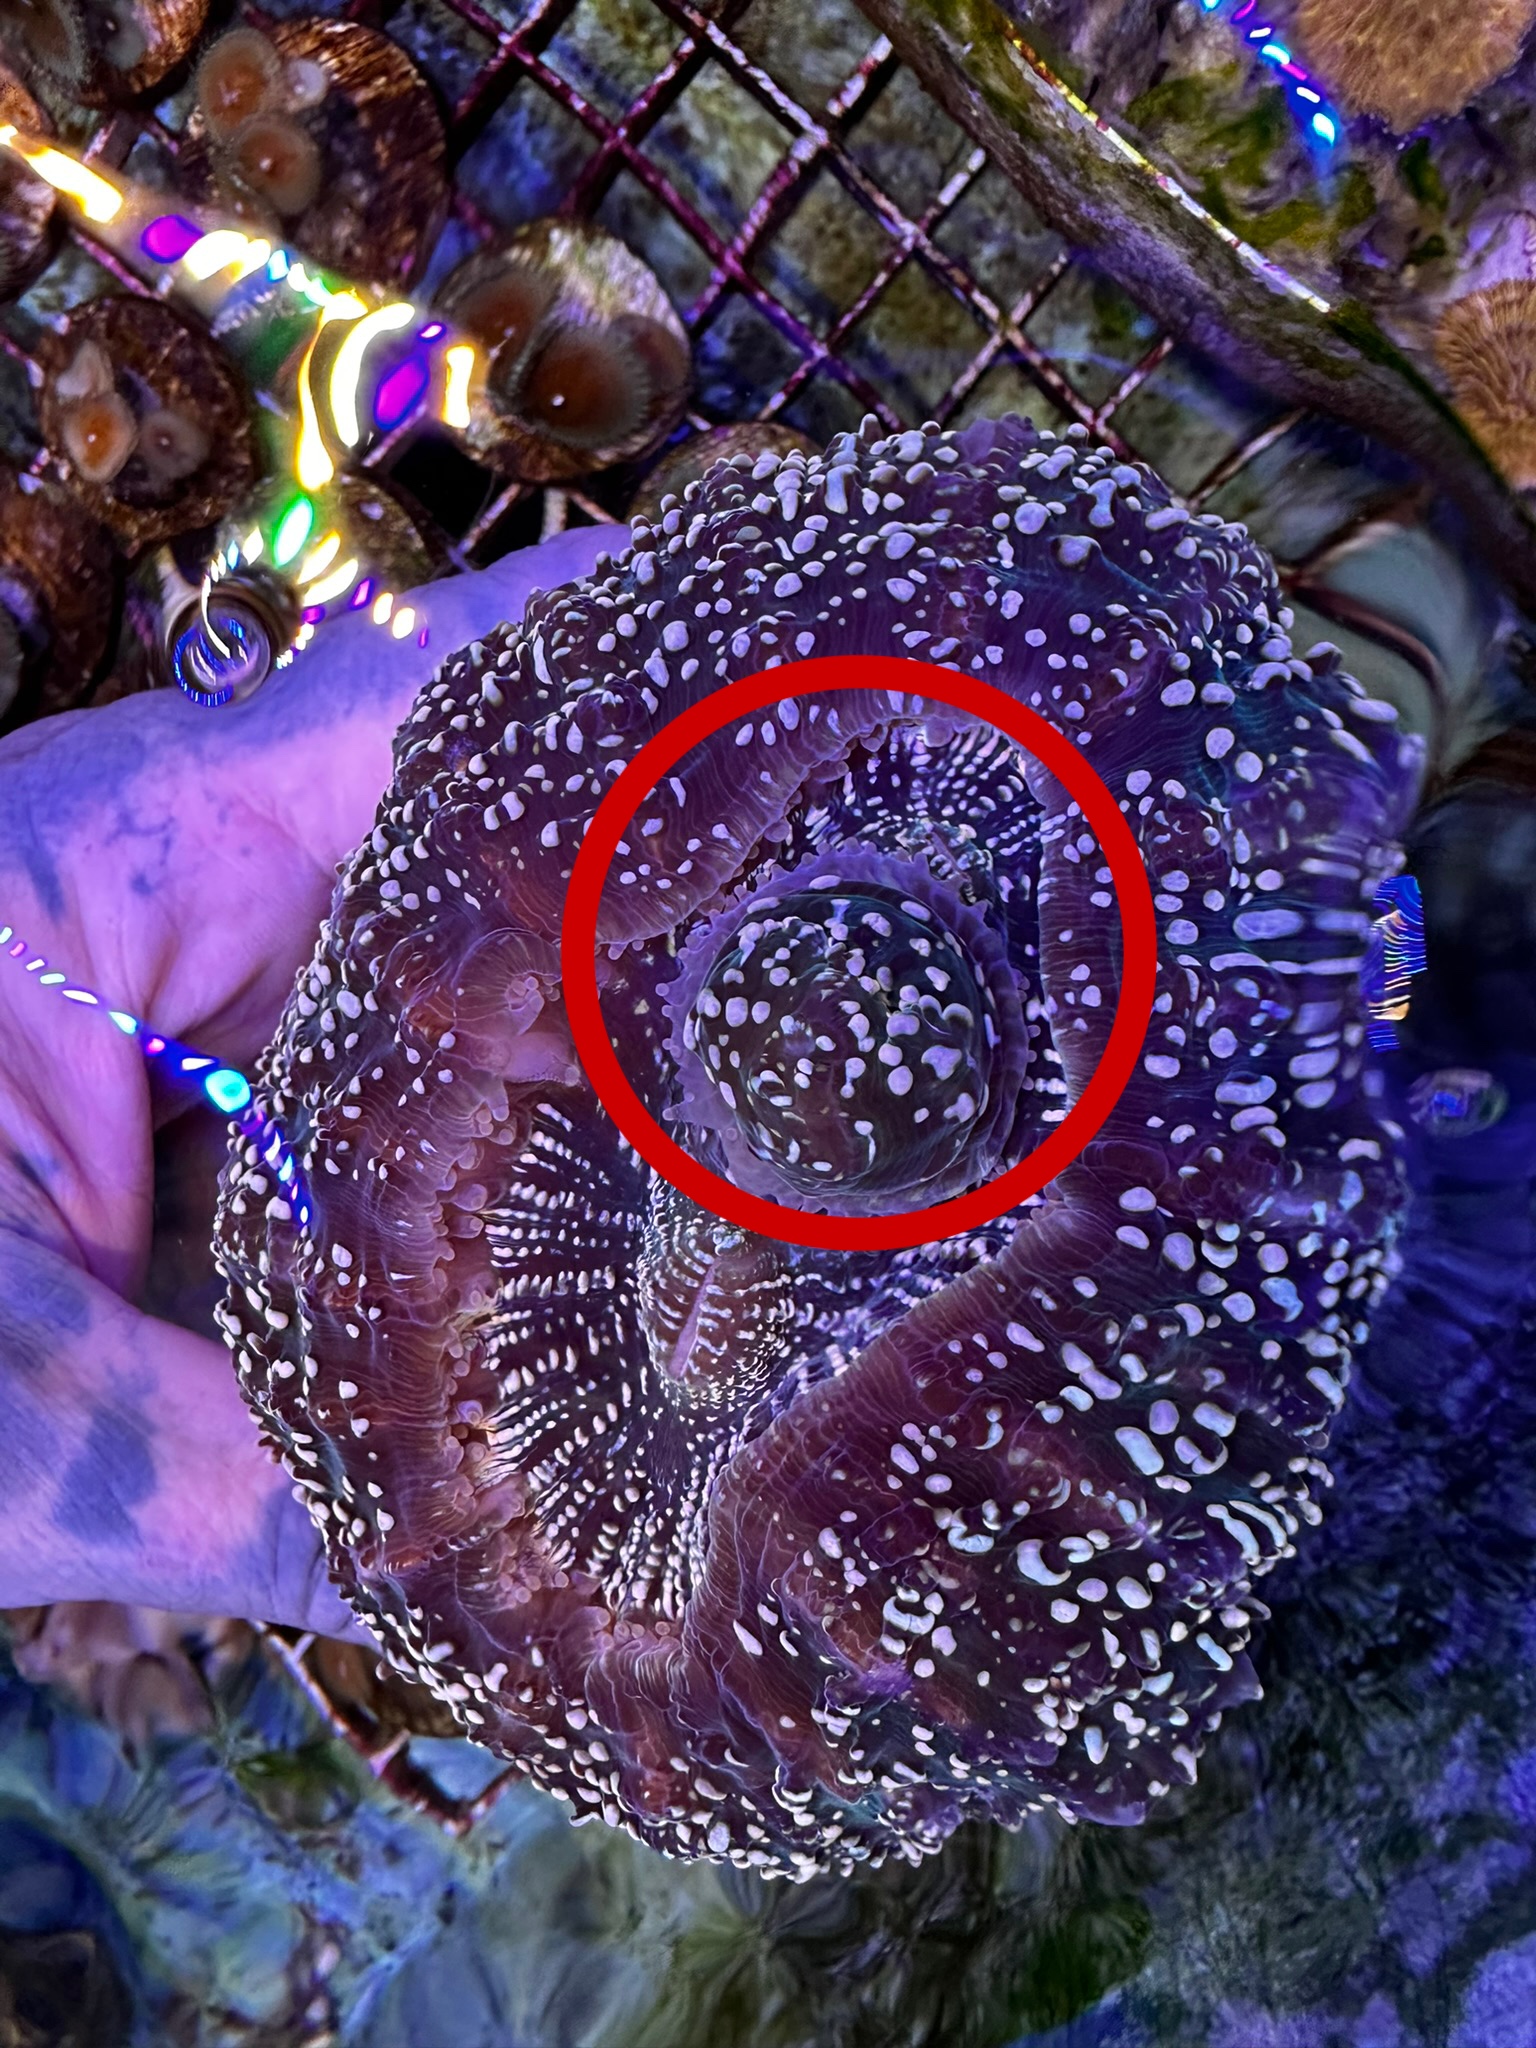
Have you wondered why some corals look the way they do when you buy them at your aquarium store? Some with a flat base cut, some with grinding marks on them, and other man-made alterations. You might have seen this and thought it was for displaying the corals easier… but there’s a bit more to it.
Out on the reef there’s as much going for corals as there is against them, for example, sponges that if not kept in check will smother corals and rot them away are actively consumed by many fish and invertebrates which keep the sponge growth down. So when wild corals come in for our aquariums they often have the same nasties they did on the reef but now they can be removed completely to protect them long term. In the ocean corals normally grow faster and recover from pest damage more quickly than they do in aquariums so the nasties that lay within aren’t as much of a concern until they are out of the pristine reef water with an abundance of natural food available.
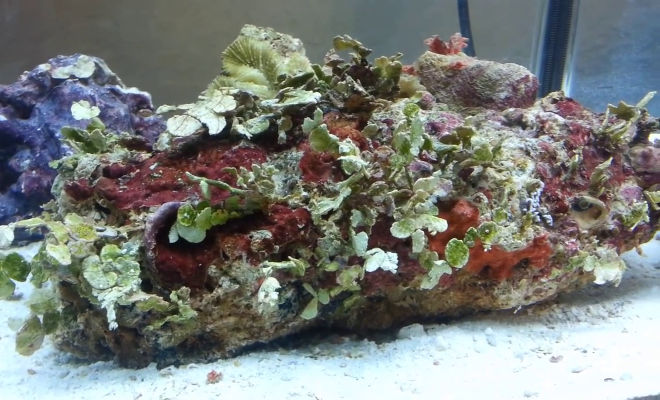
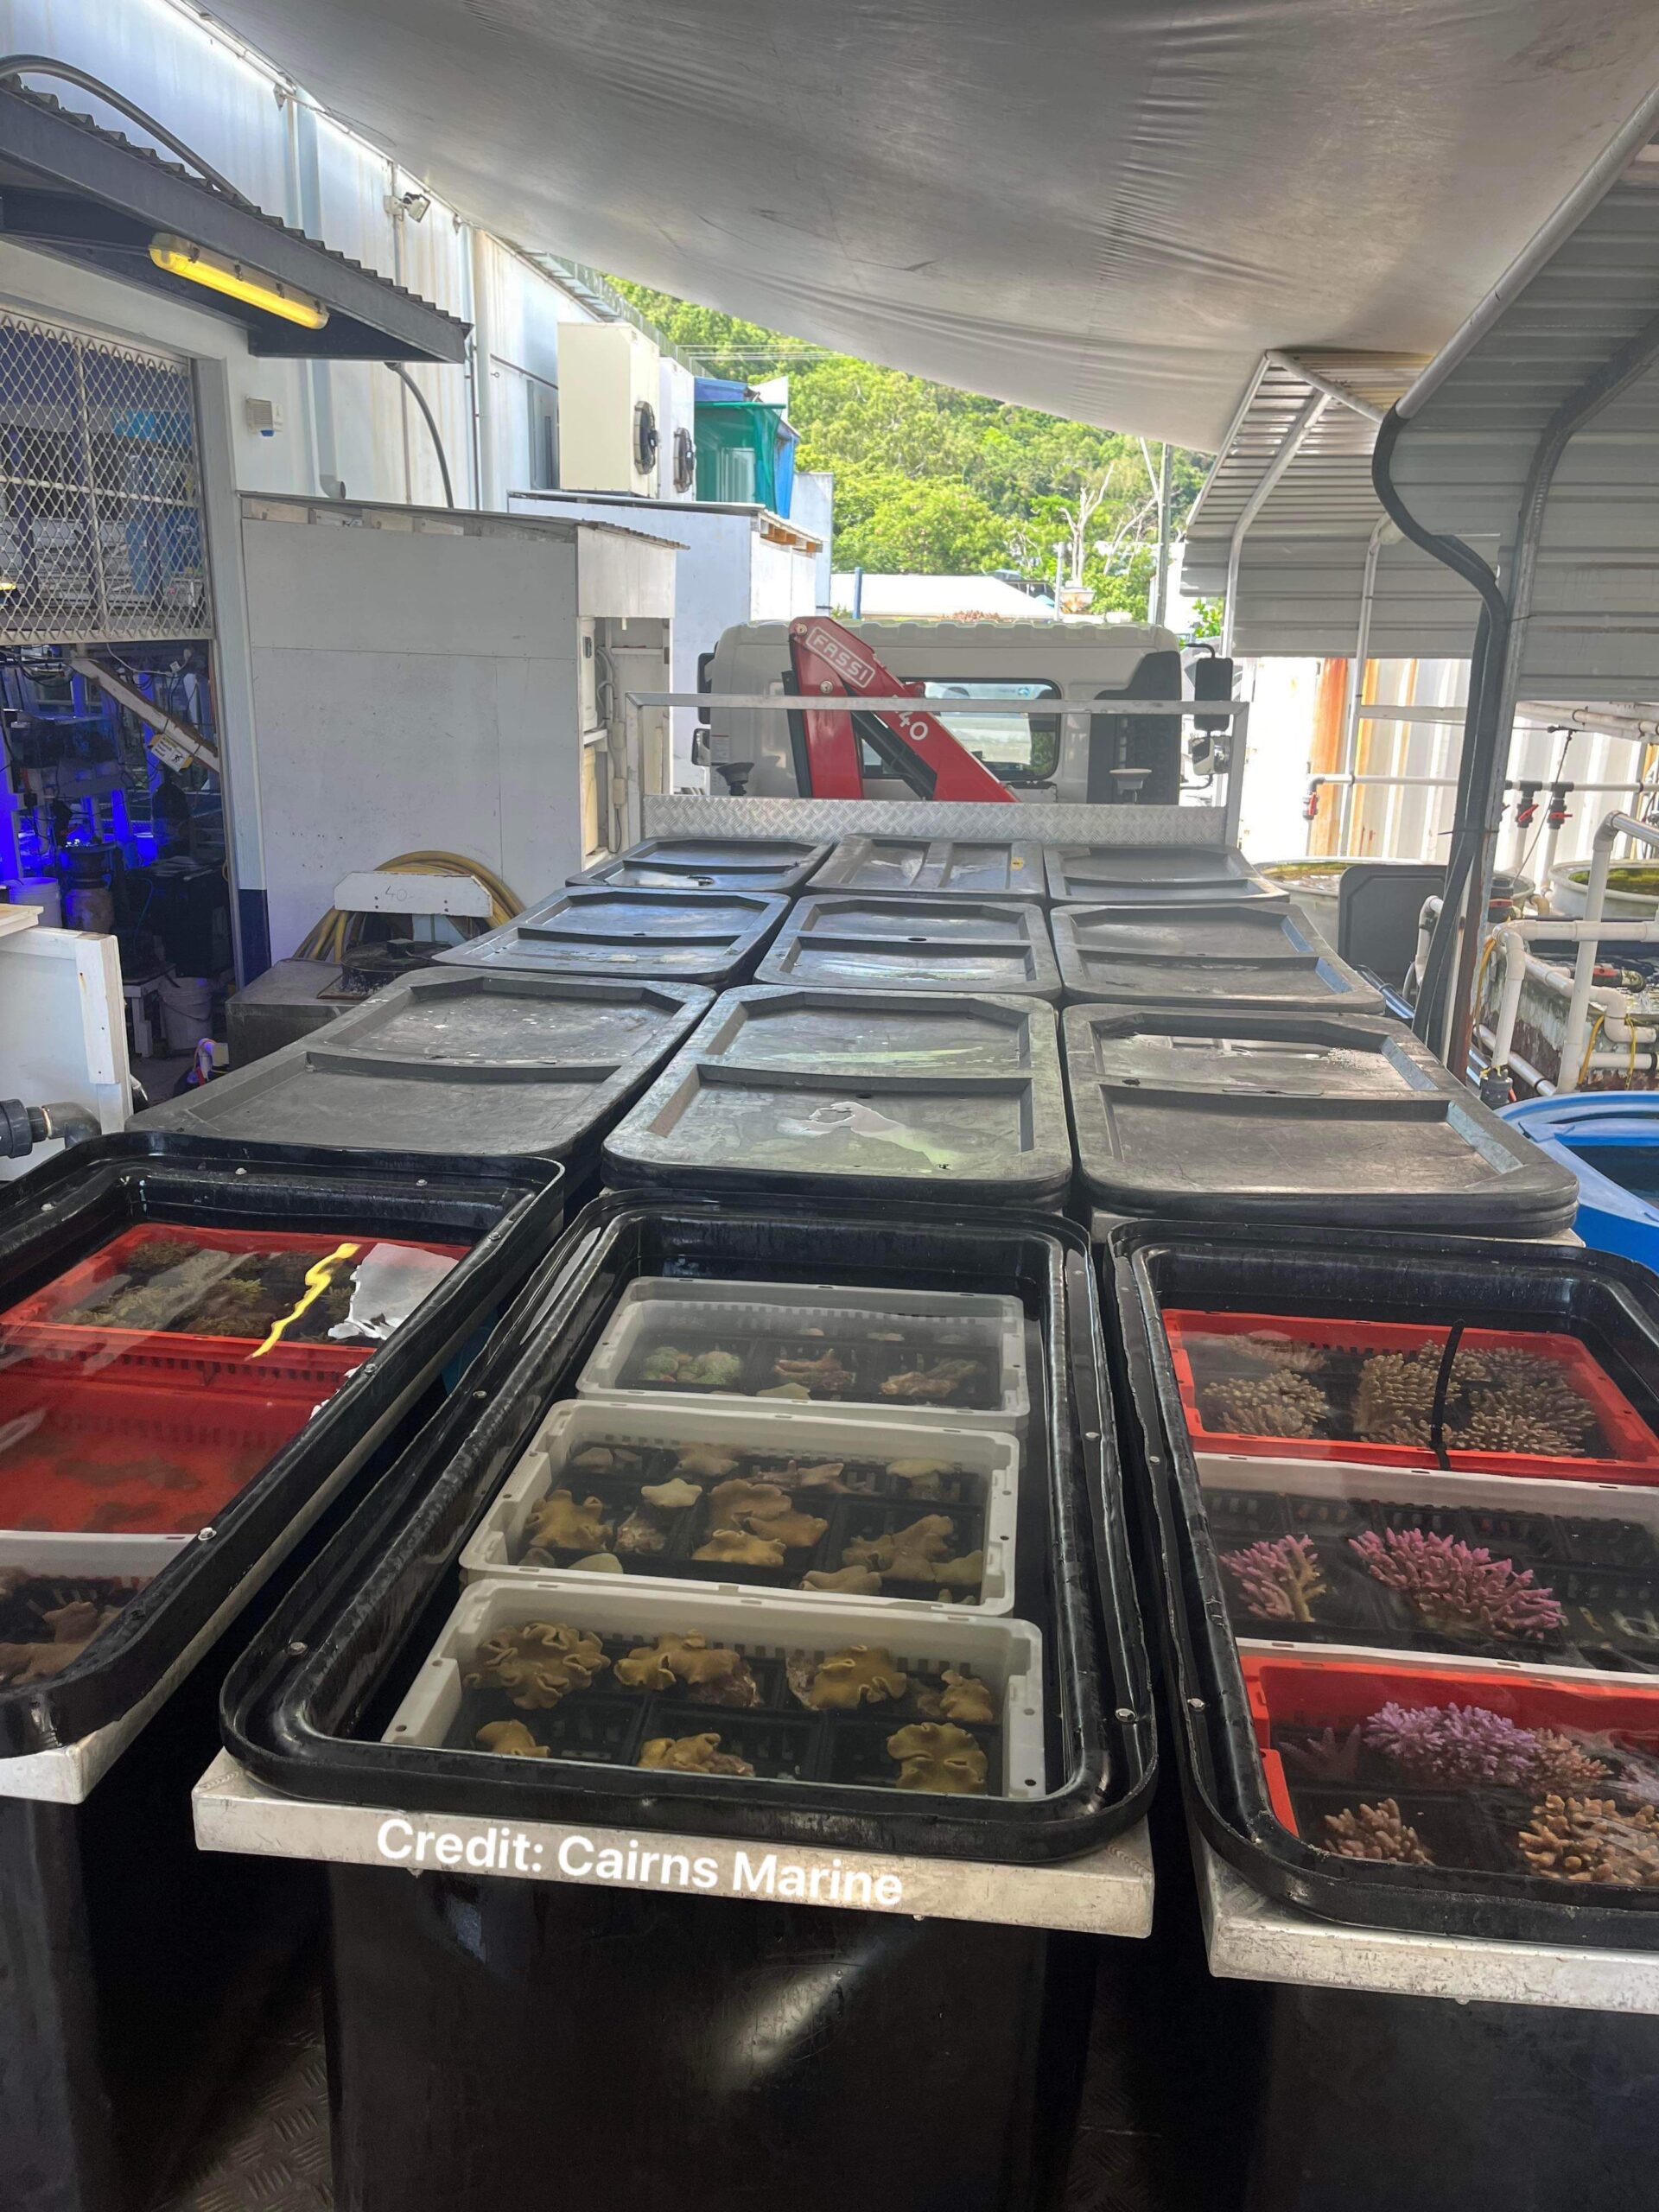
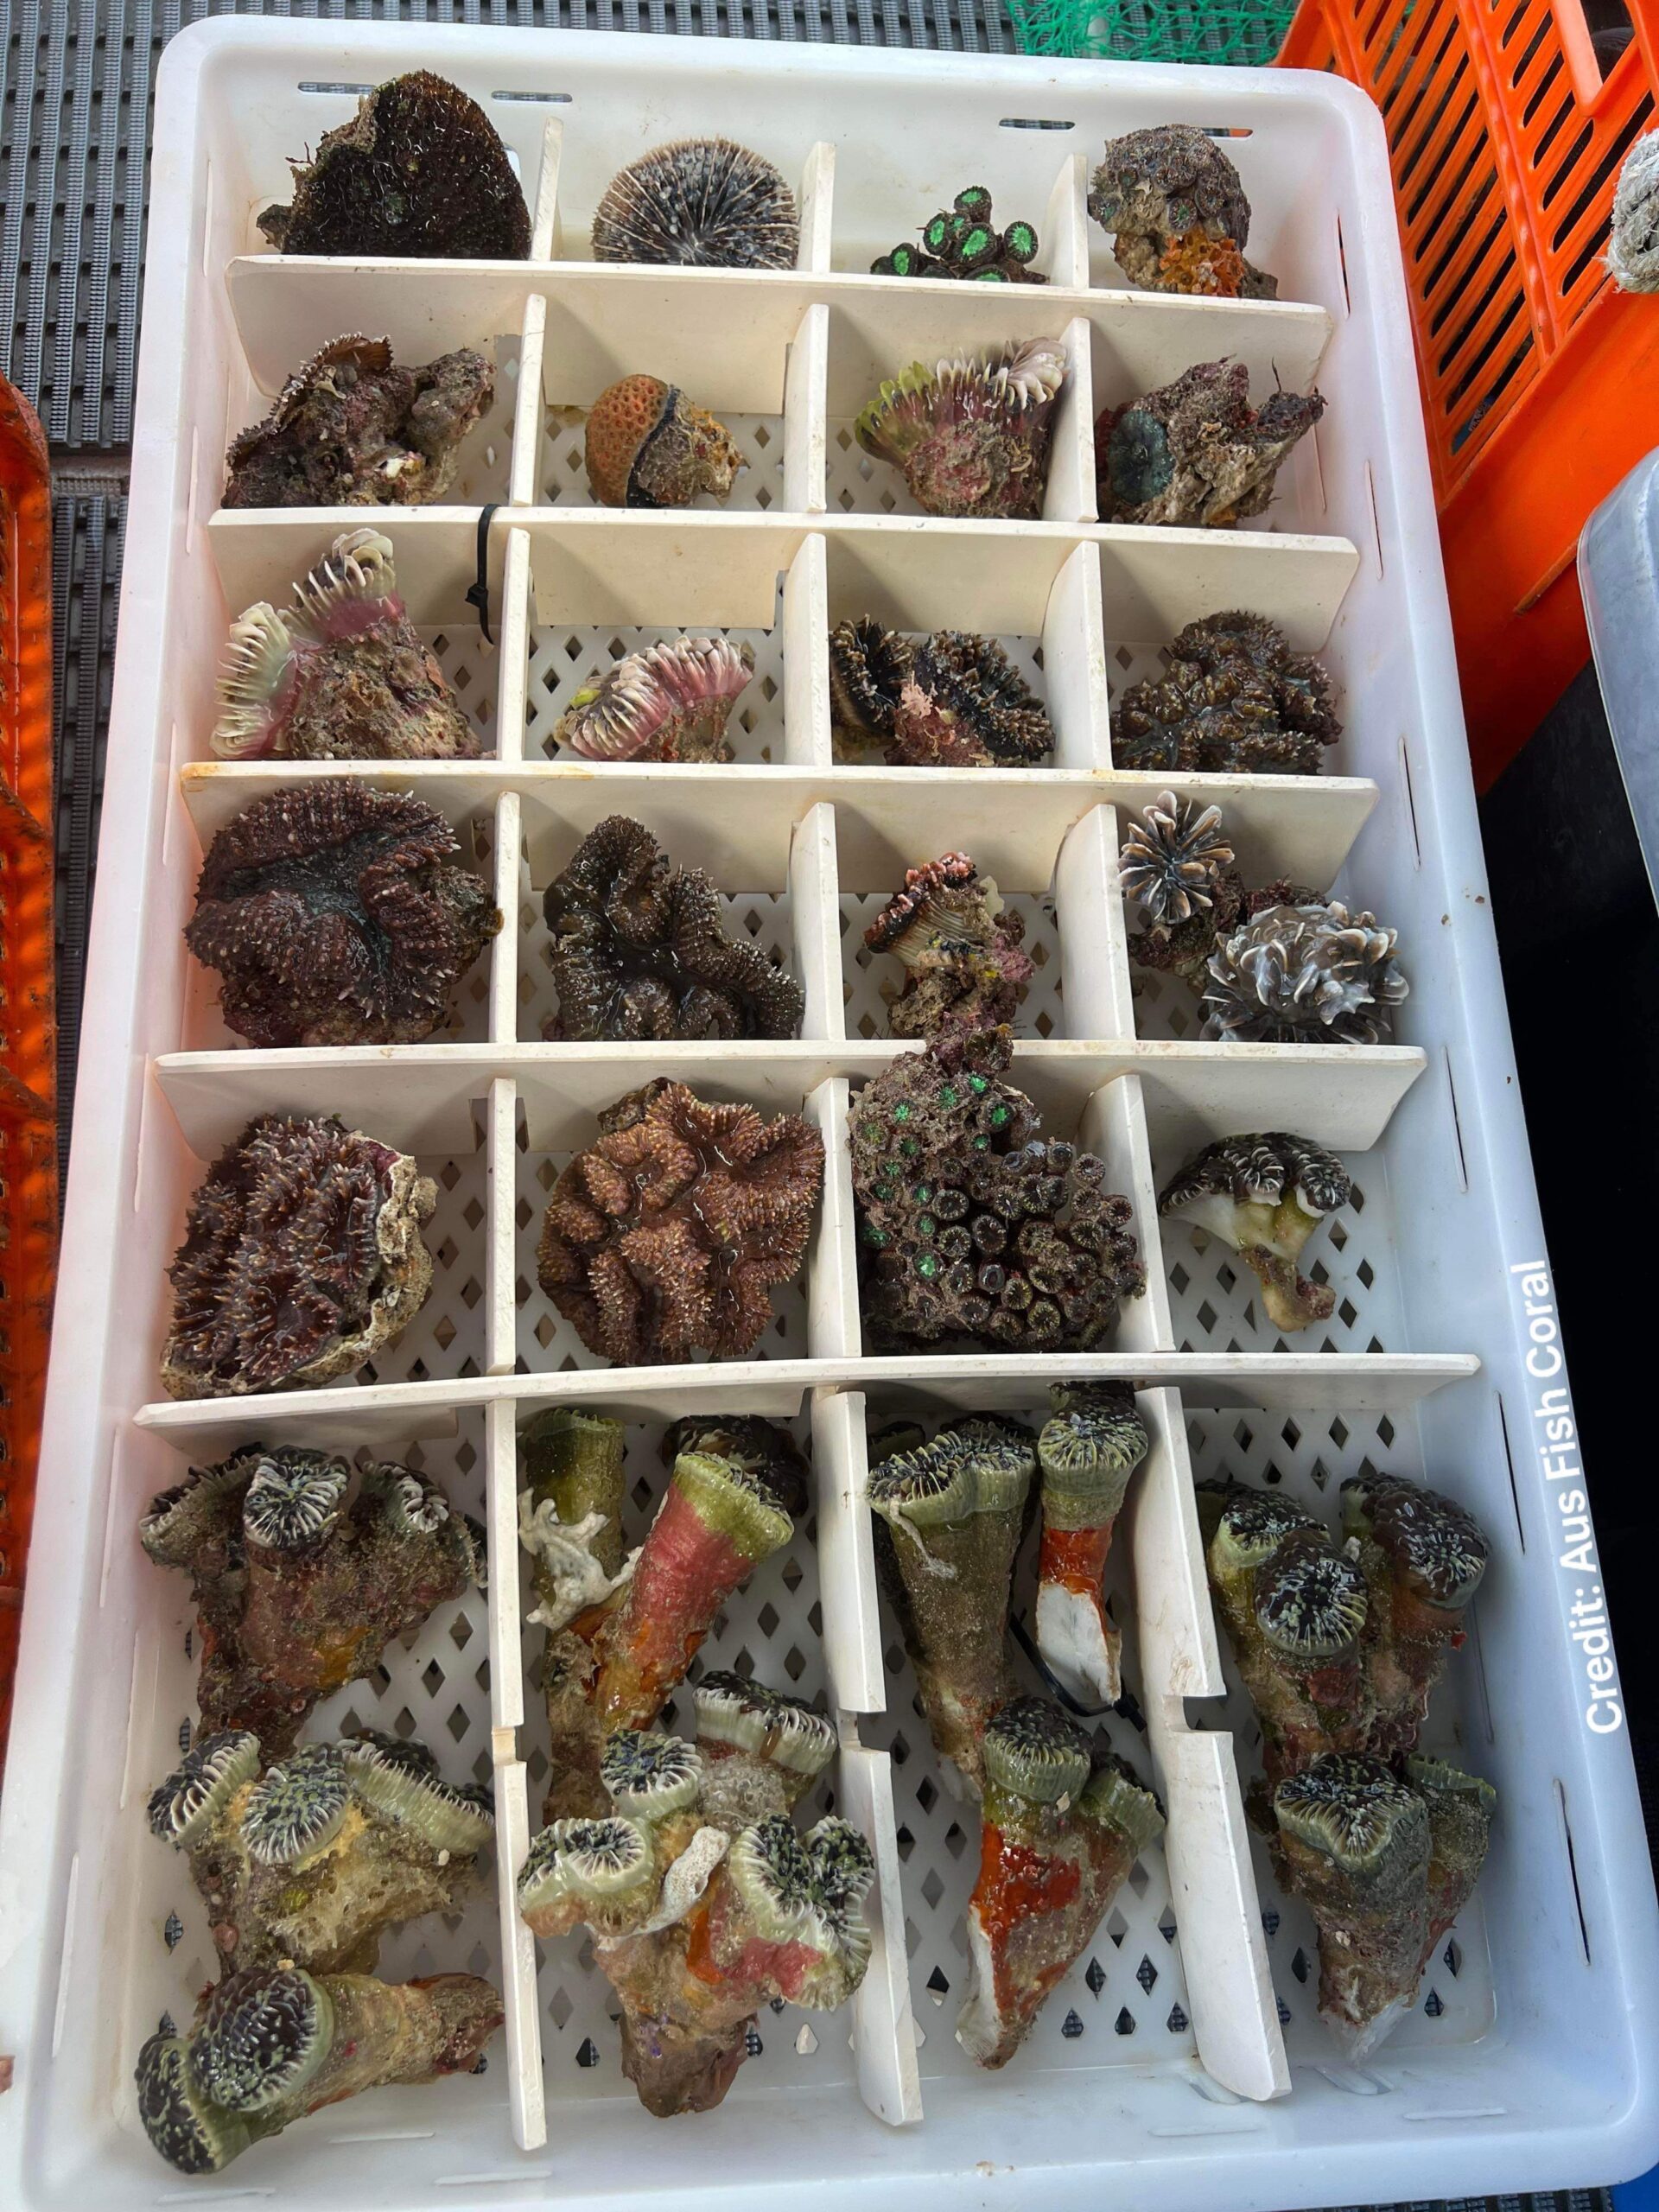
Should the collection trip be successful, the coral unloading is an exciting time to be around. So today we’re going to show you before and after the trimming, along with what you might find inside! The coral comes in from the reef in large tubs, buckets, and small containers for delicate pieces. Getting these freshly collected corals into the holding systems and processed quickly will ensure that the majority of these potential issues are mitigated and the coral is ready for export or further processing into aquaculture facilities. The corals are quickly sorted into groups and species as best possible so the trimming and grading can begin.
I believe the trimming done at the wild coral collection facilities in Australia is acceptable and fit for purpose. It’s likely the corals will arrive at their export destination to a wholesaler and they will normally check the corals over and assess if any further cleaning up is necessary. Trimming the corals is a really important part of the process for a number of reasons that we’re about to cover and it’s something that I hope with more understanding, reefers at home will be able to identify corals that would benefit from trimming and ways you can do it at home if it’s required.
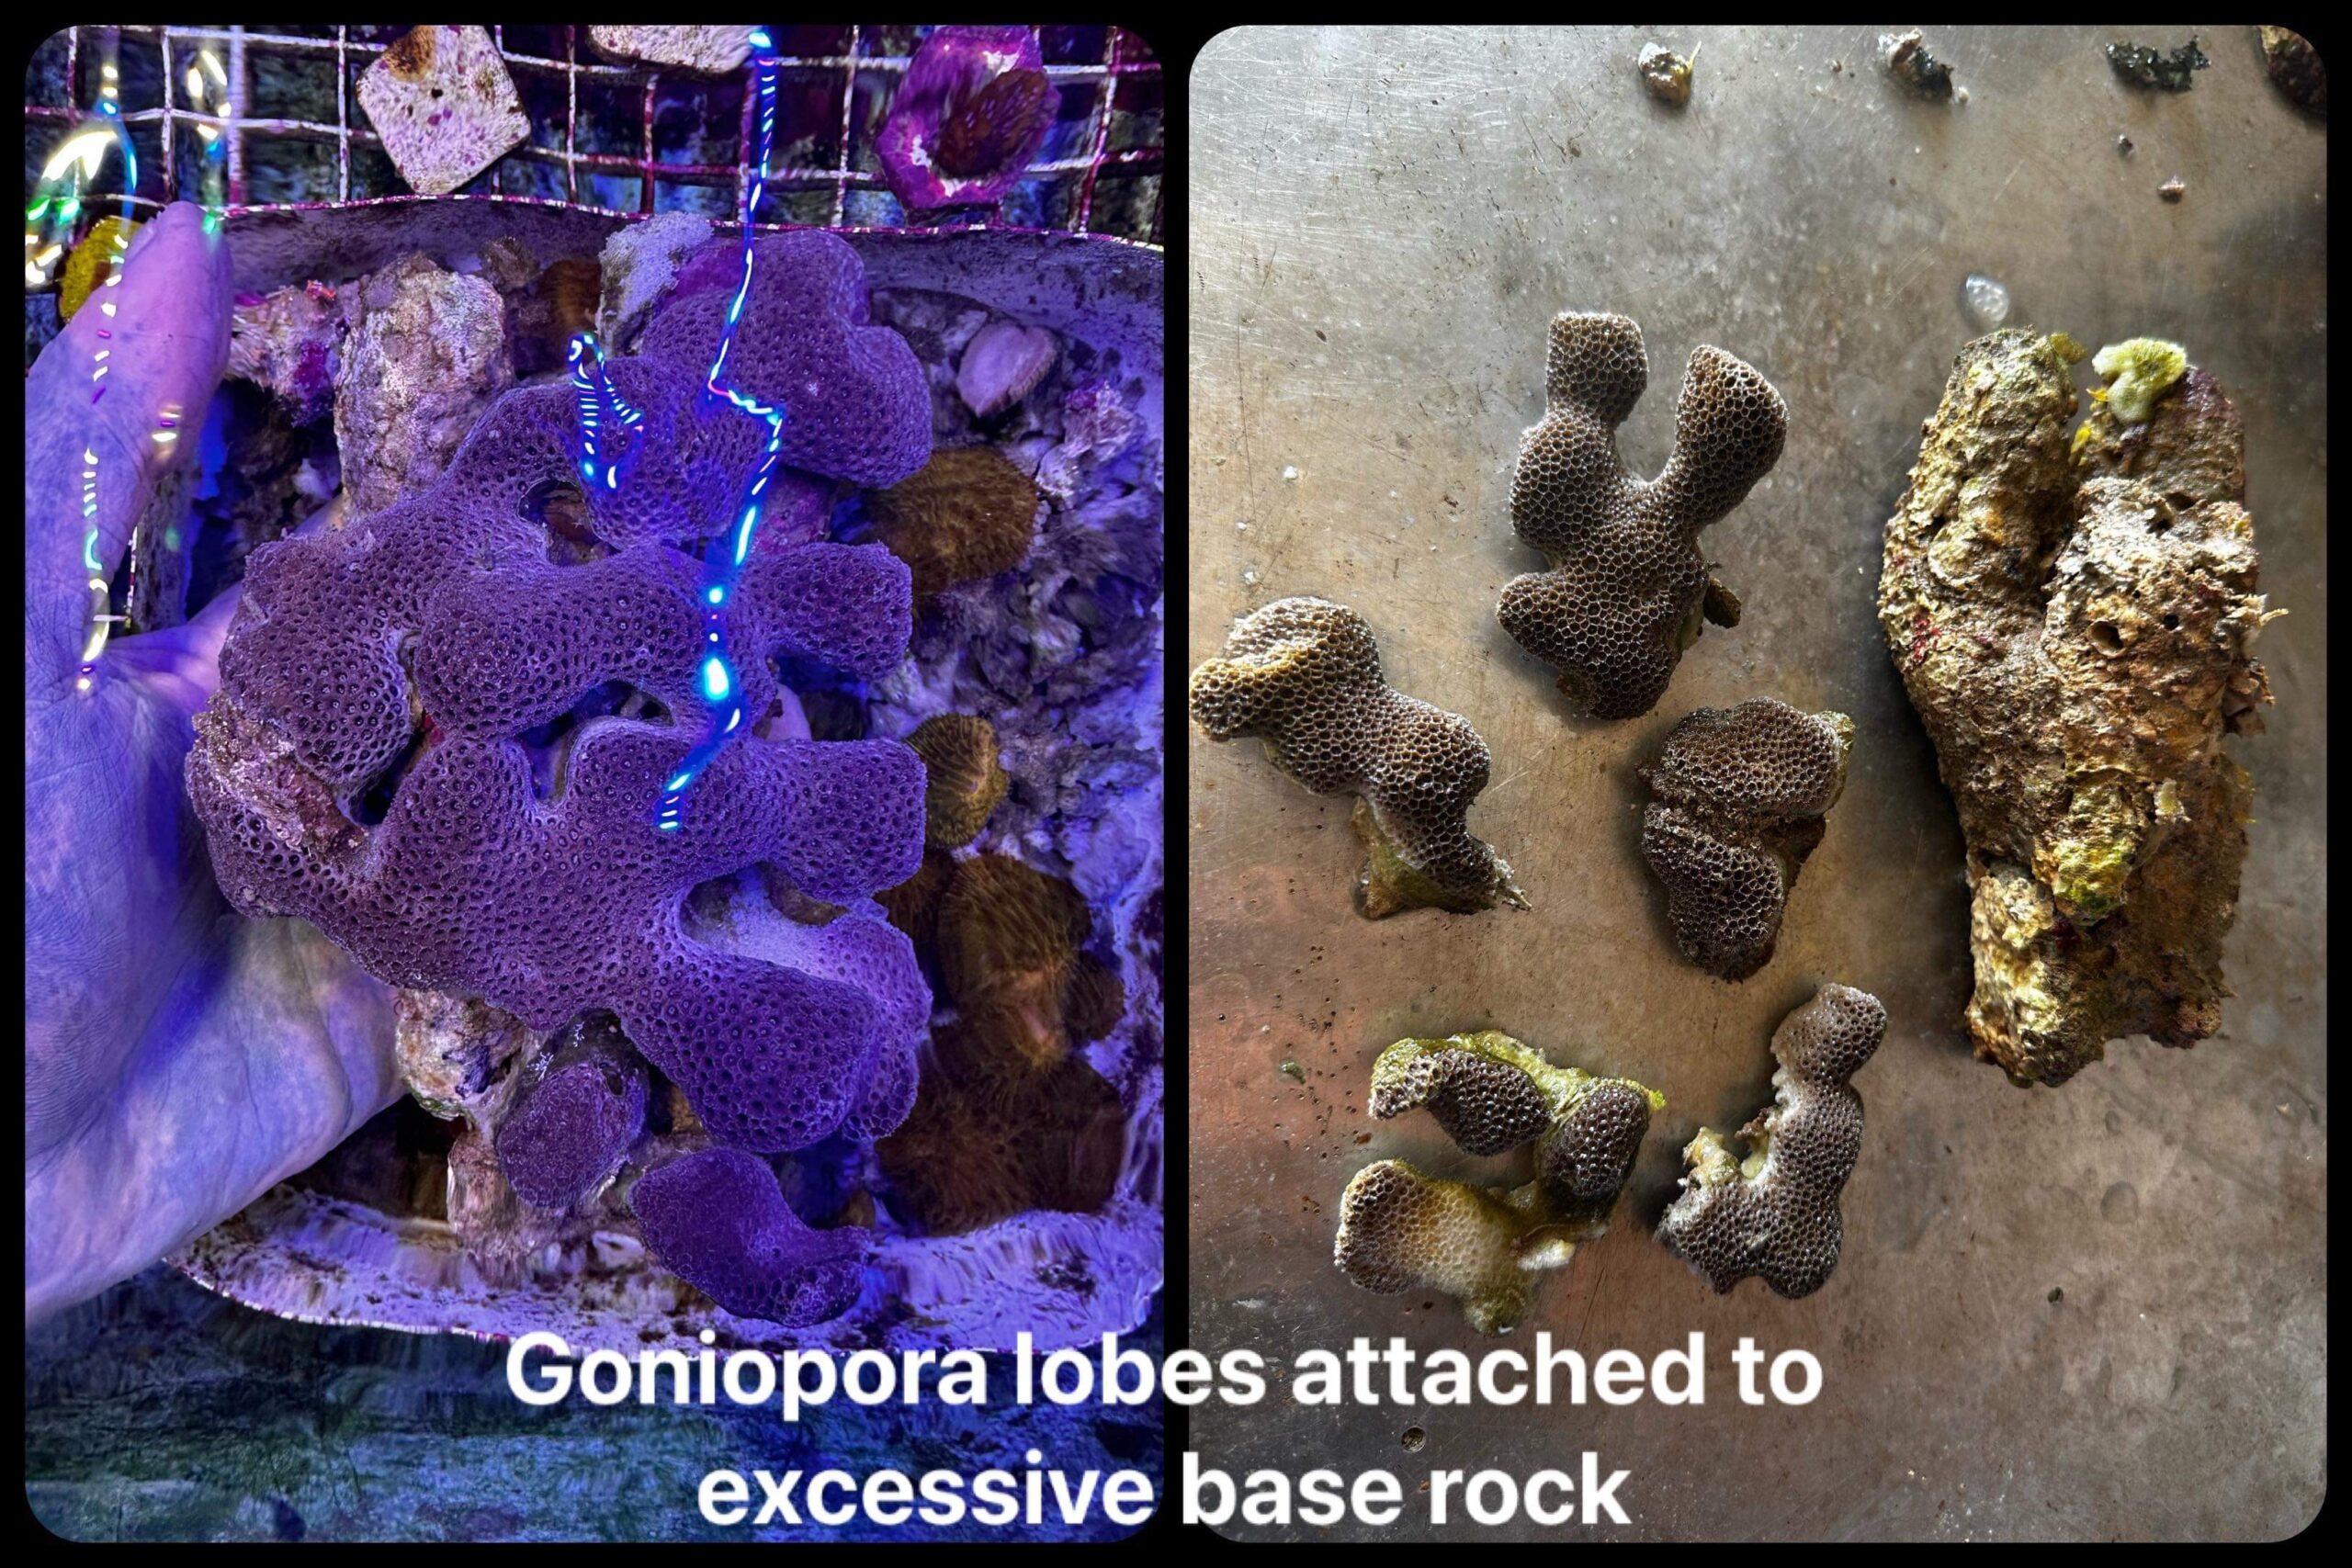
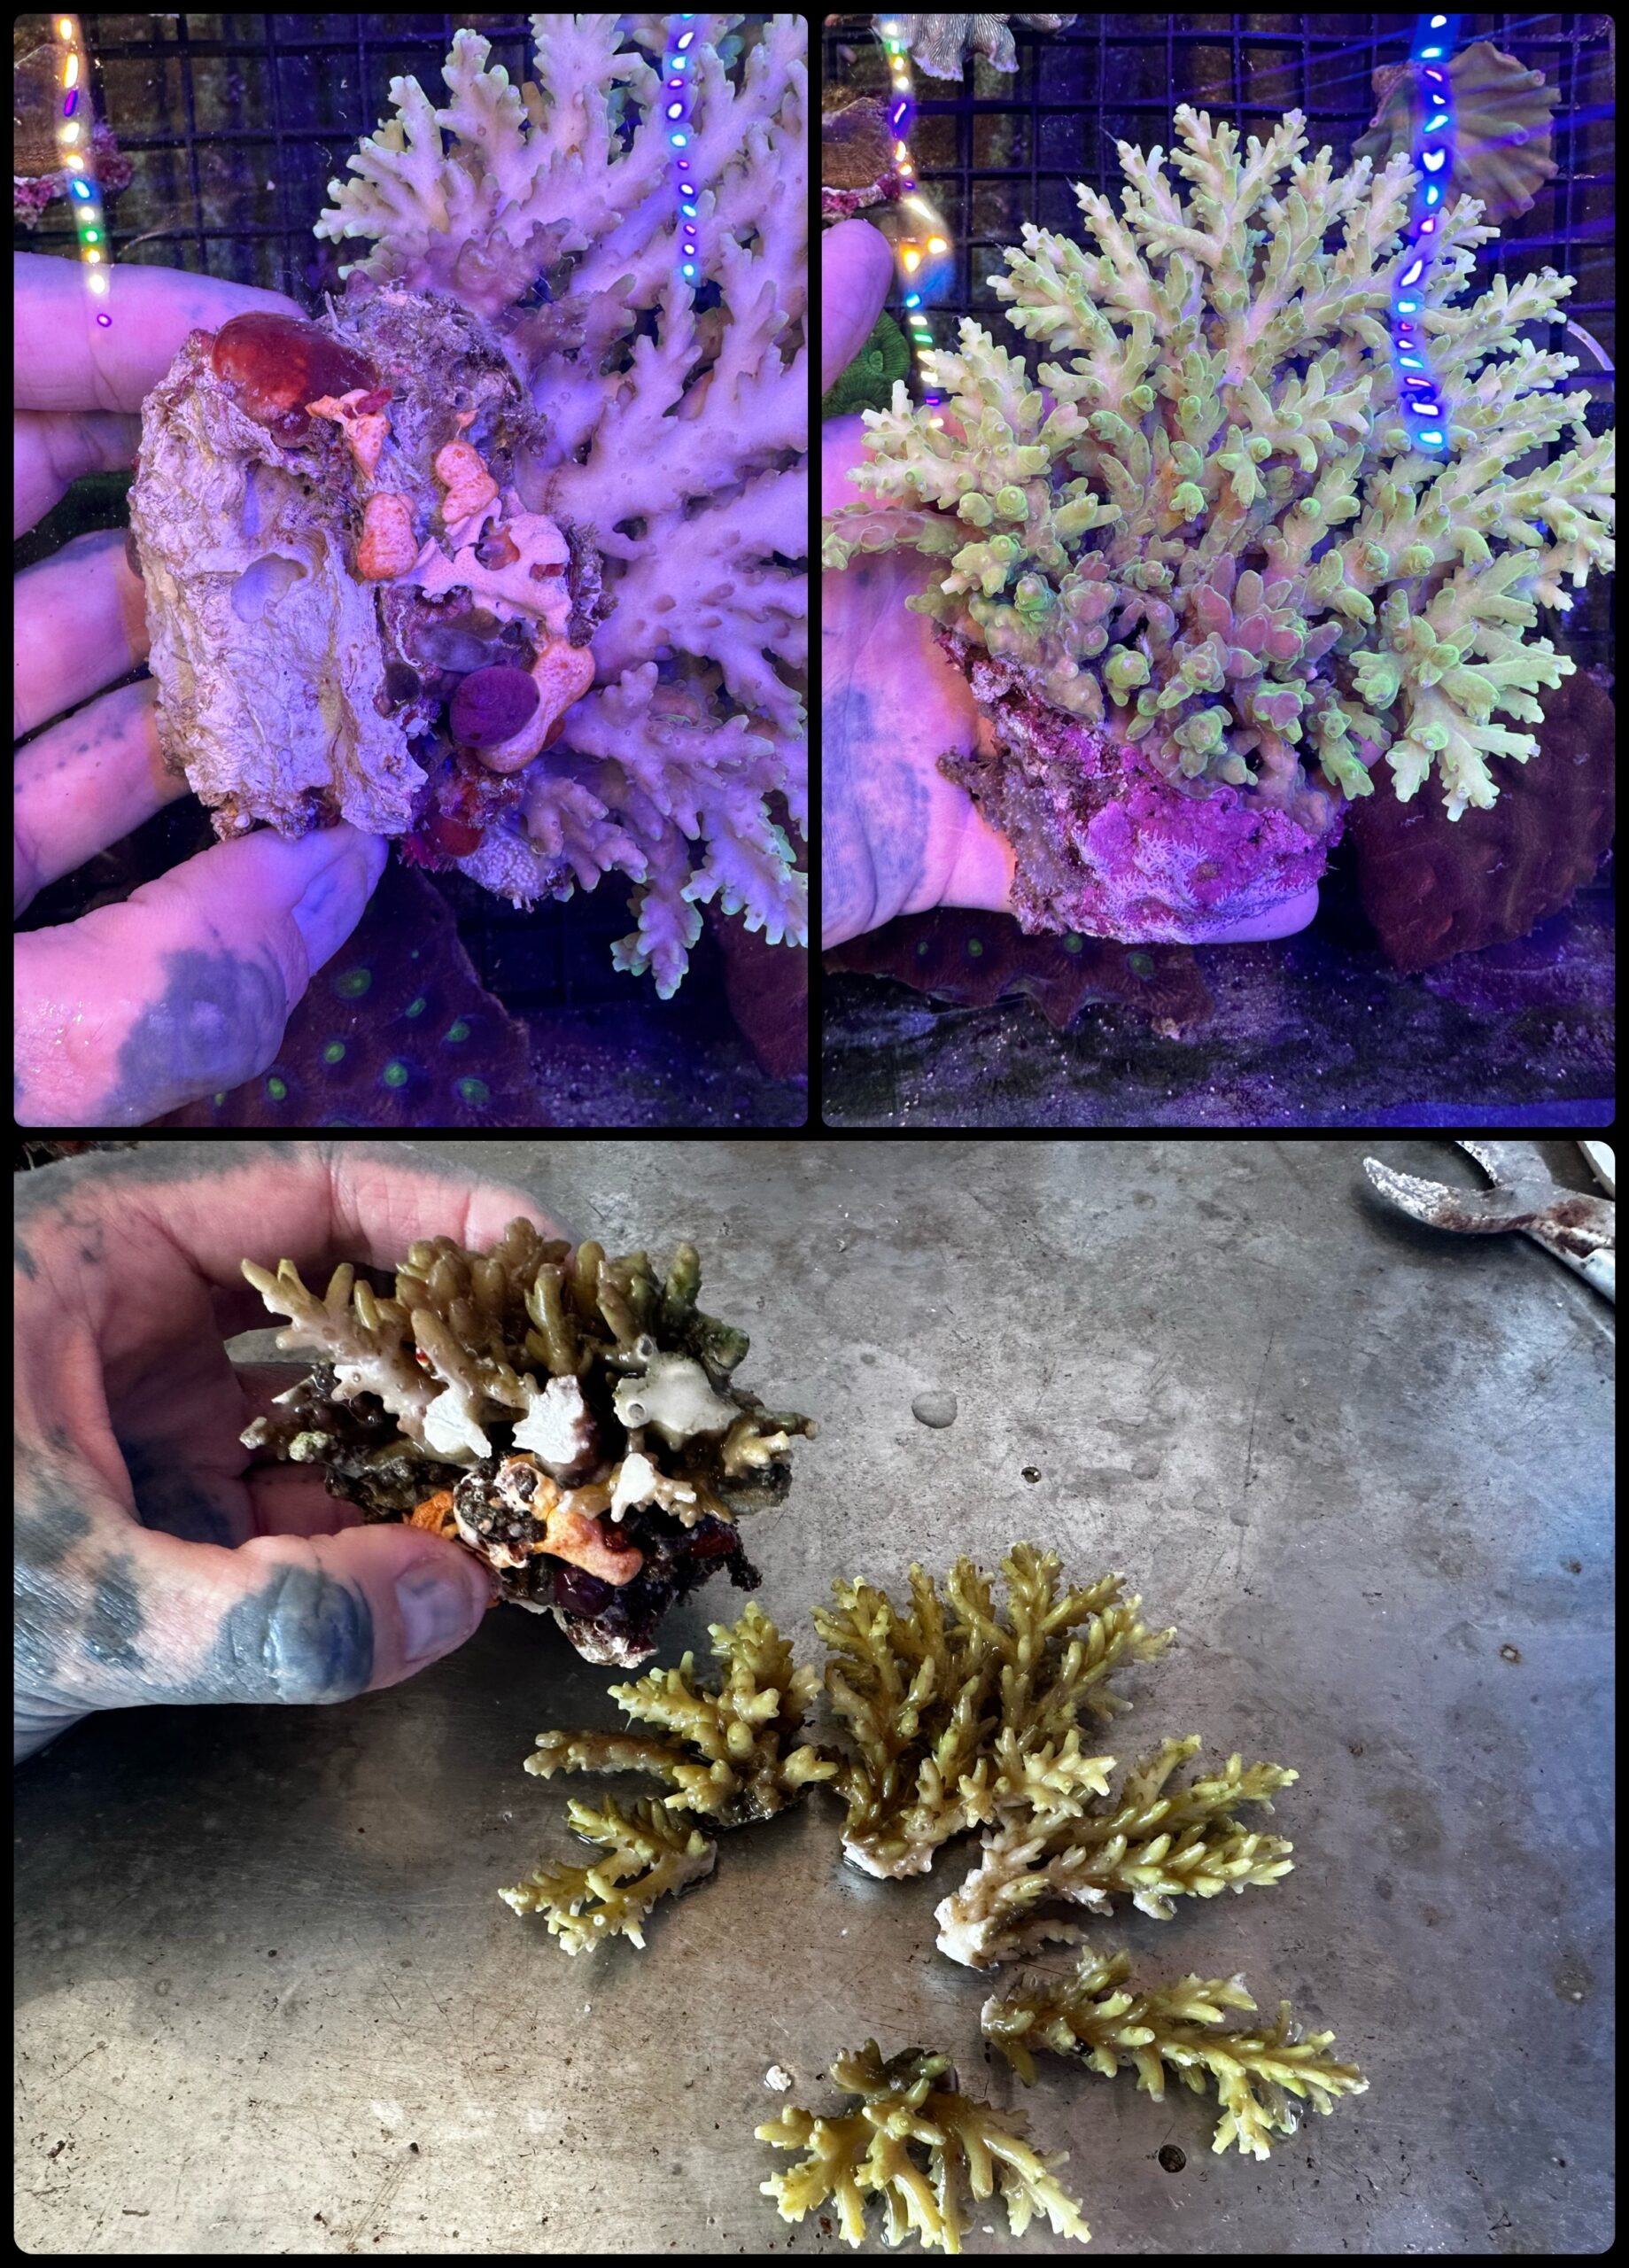
Firstly we need to identify what corals need to be trimmed and why, so let’s begin with excess rock that could be attached. When corals are collected in Australia it’s a law that only hand tools (hammer and chisel) can be used to harvest. So in order to keep the coral free of chisel impact damage it’s sometimes necessary to chip away further below the coral and bring home some rock/live rock with it. This isn’t ideal for aquariums because it can harbor the nasties and hide them from view until you start cutting into them.
Excess rock and irrelevant coral skeleton (which will be covered soon) that is normally sharp or jagged can compromise the bags they are shipped in while adding extra unnecessary weight to the shipment. This trimming will be done already to some extent but you may need to take it further and trim away more. So by removing this rock, you remove a lot of pests and their eggs that can introduce things like Acropora eating flatworms. Sponges and other pests that can go stinky and poison the holding system or foul the bag during shipping are no longer a problem after trimming.
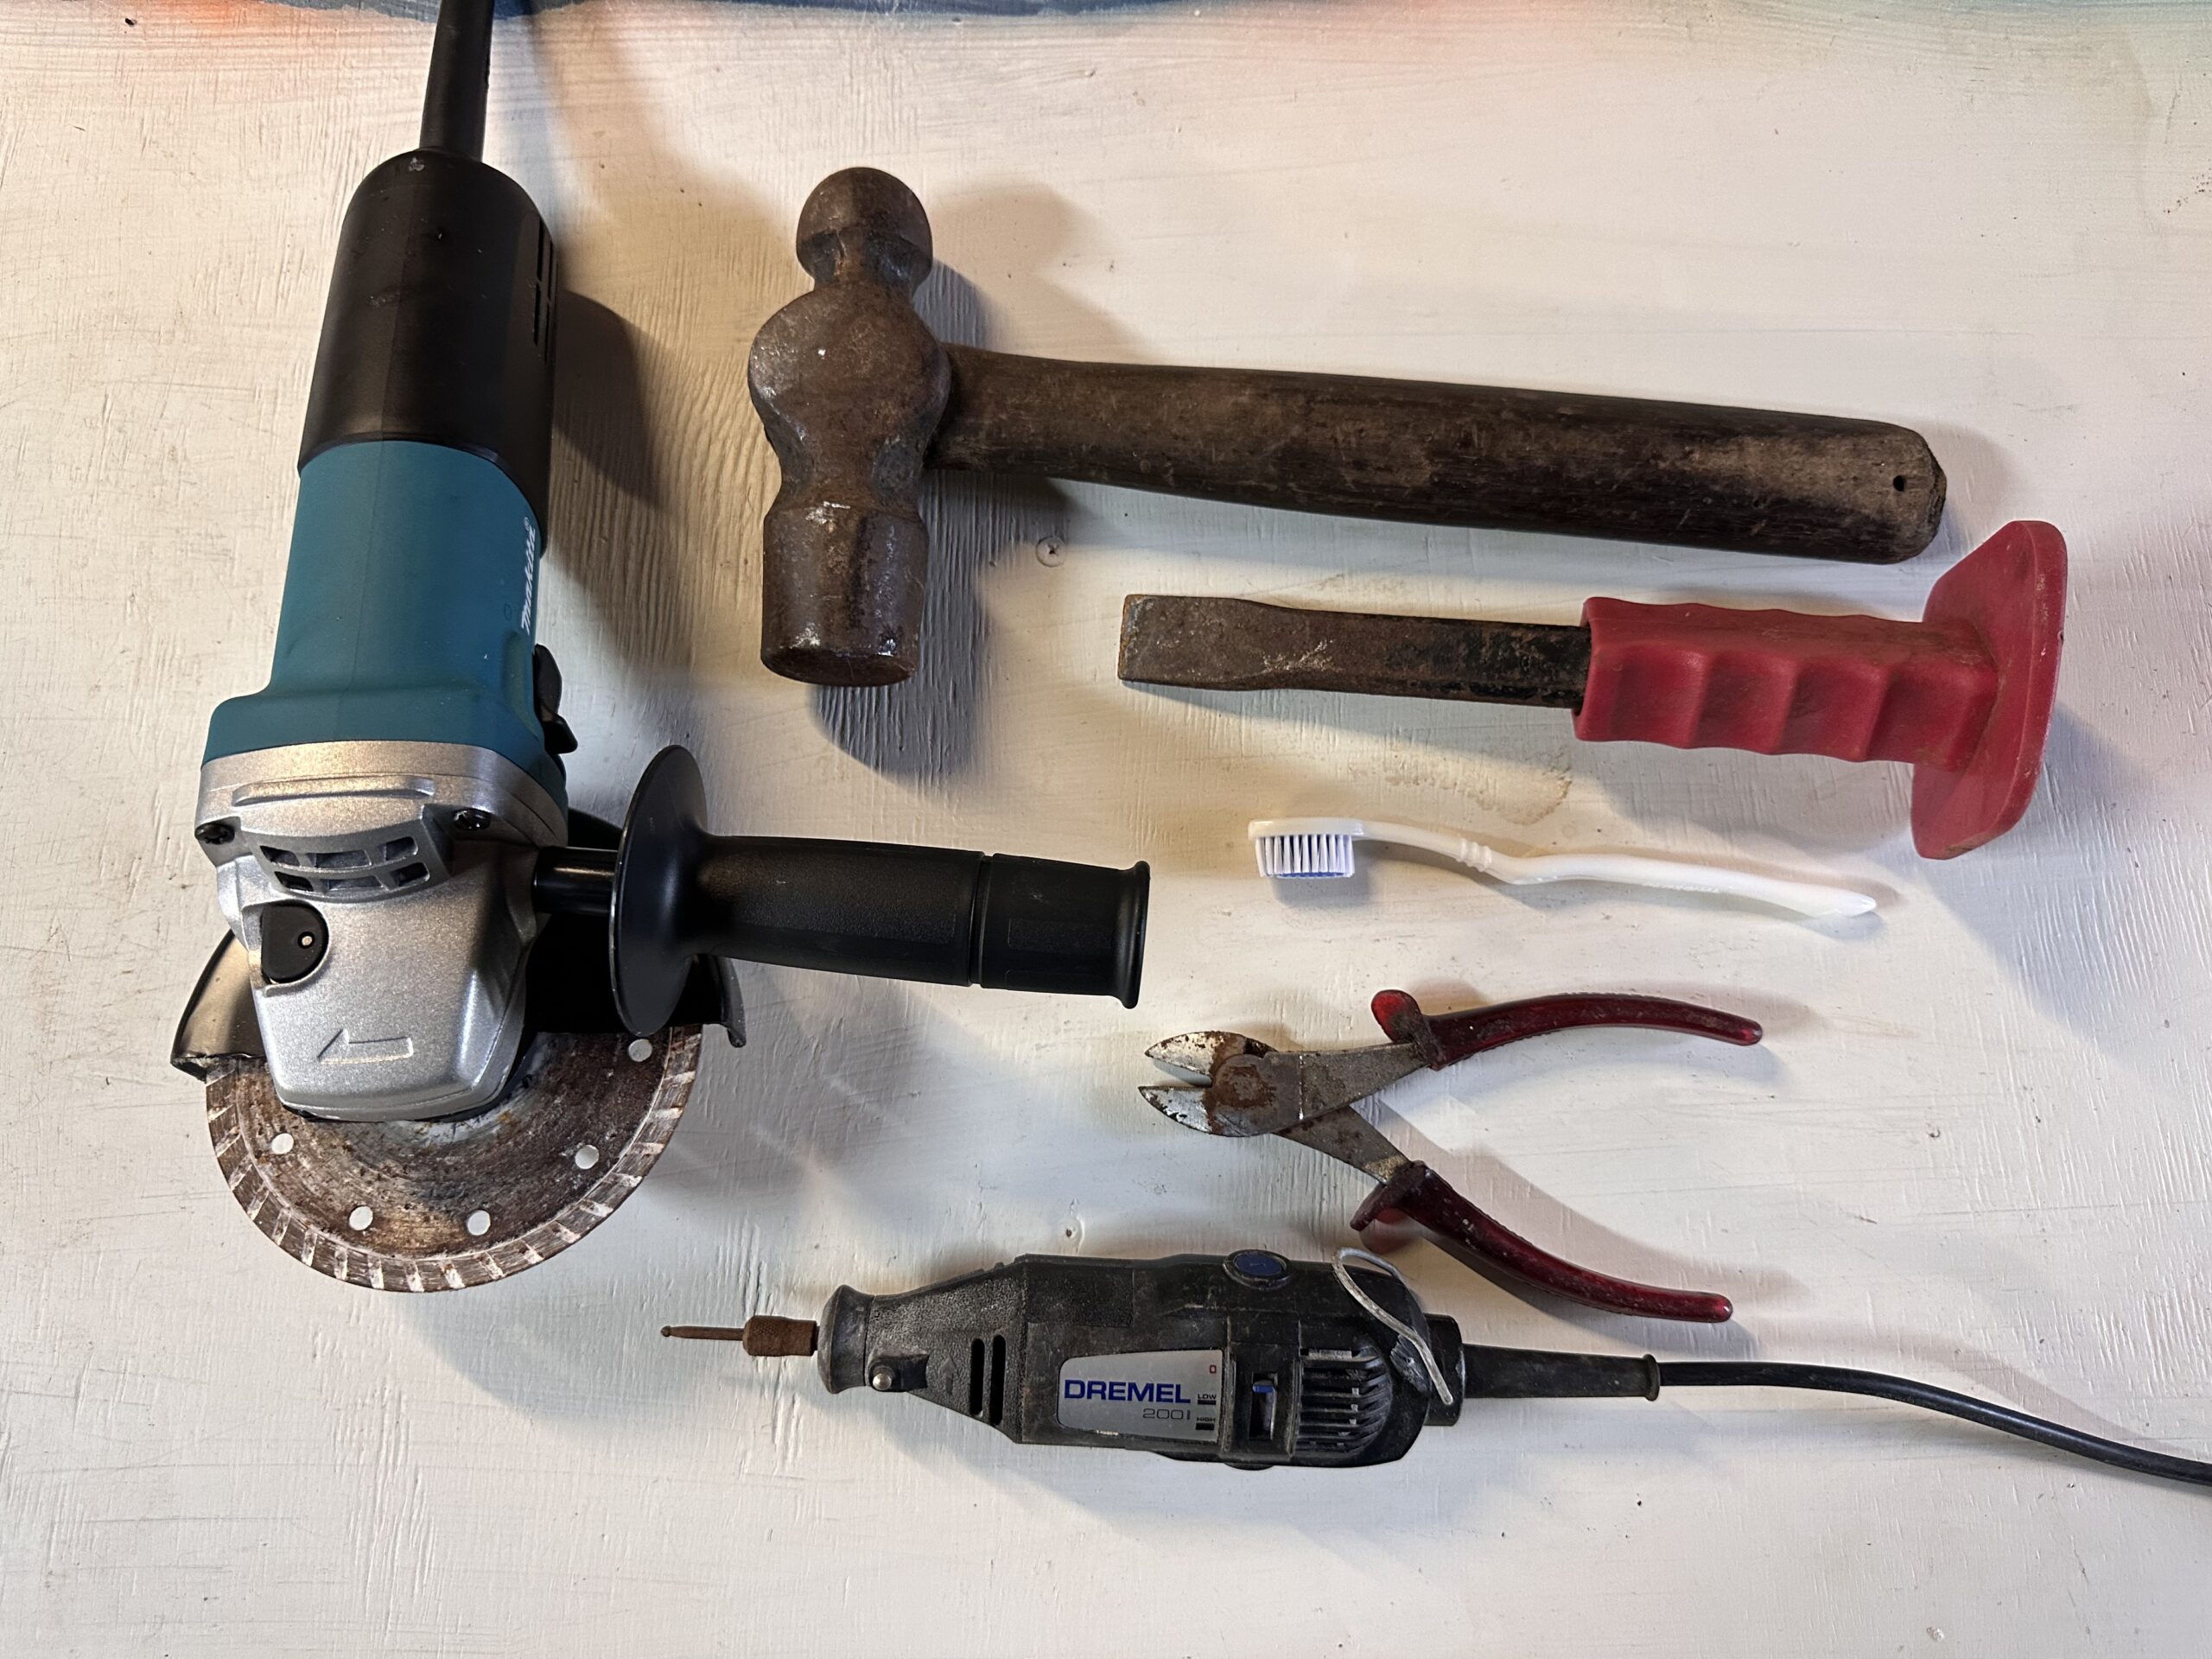
Trimming away rock and skeleton can be difficult for most people at home but don’t be afraid to get inventive, electricians side cutters are good for softer rock and skeleton, they crunch it up fairly well. A Dremel rotary tool or a tile-cutting disc on an angle grinder is also useful and effective if you’re comfortable using one. A hammer and chisel for larger chunks of rock, a screwdriver, and even an old toothbrush can be great tools for cleaning up corals at home. Your LFS may also have a diamond bandsaw and be able to help you trim it.
The term “irrelevant skeleton” might sound a bit strange but due to corals growing continuously the skeleton underneath thickens and builds the reef. Stony corals are reef-building corals. The soft tissue covering a stony coral only occupies the top layer and needs just a few millimeters of the skeleton below the tissue inside. Anything below the tissue attachment area is irrelevant to the health and future of that piece and removing it will help expose even more pests that like to take residence deep inside the old skeleton growth.
Removing this is again going to be difficult at home so be sure that you need to do this. The depth in which you cut and how much skeleton is removed will depend on the species but they are all fairly close. The color of the newly deposited (relevant and required) skeleton is often nicer looking and more clean so that’s a good indicator of when to stop. This process is best done while keeping the coral wet so the angle grinder may not be suitable as it heats up the area of cutting a bit and could burn the living tissue on the other side.

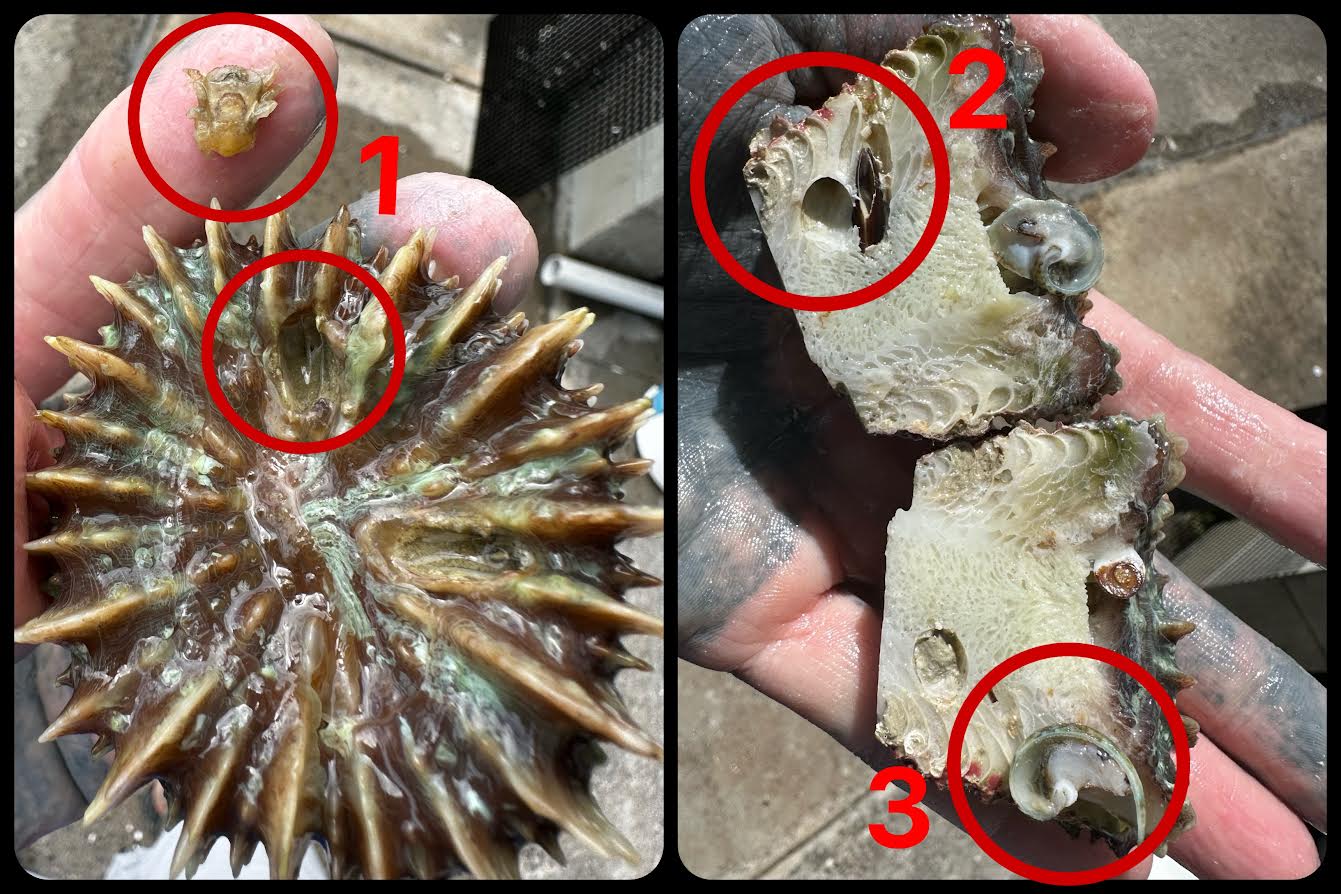
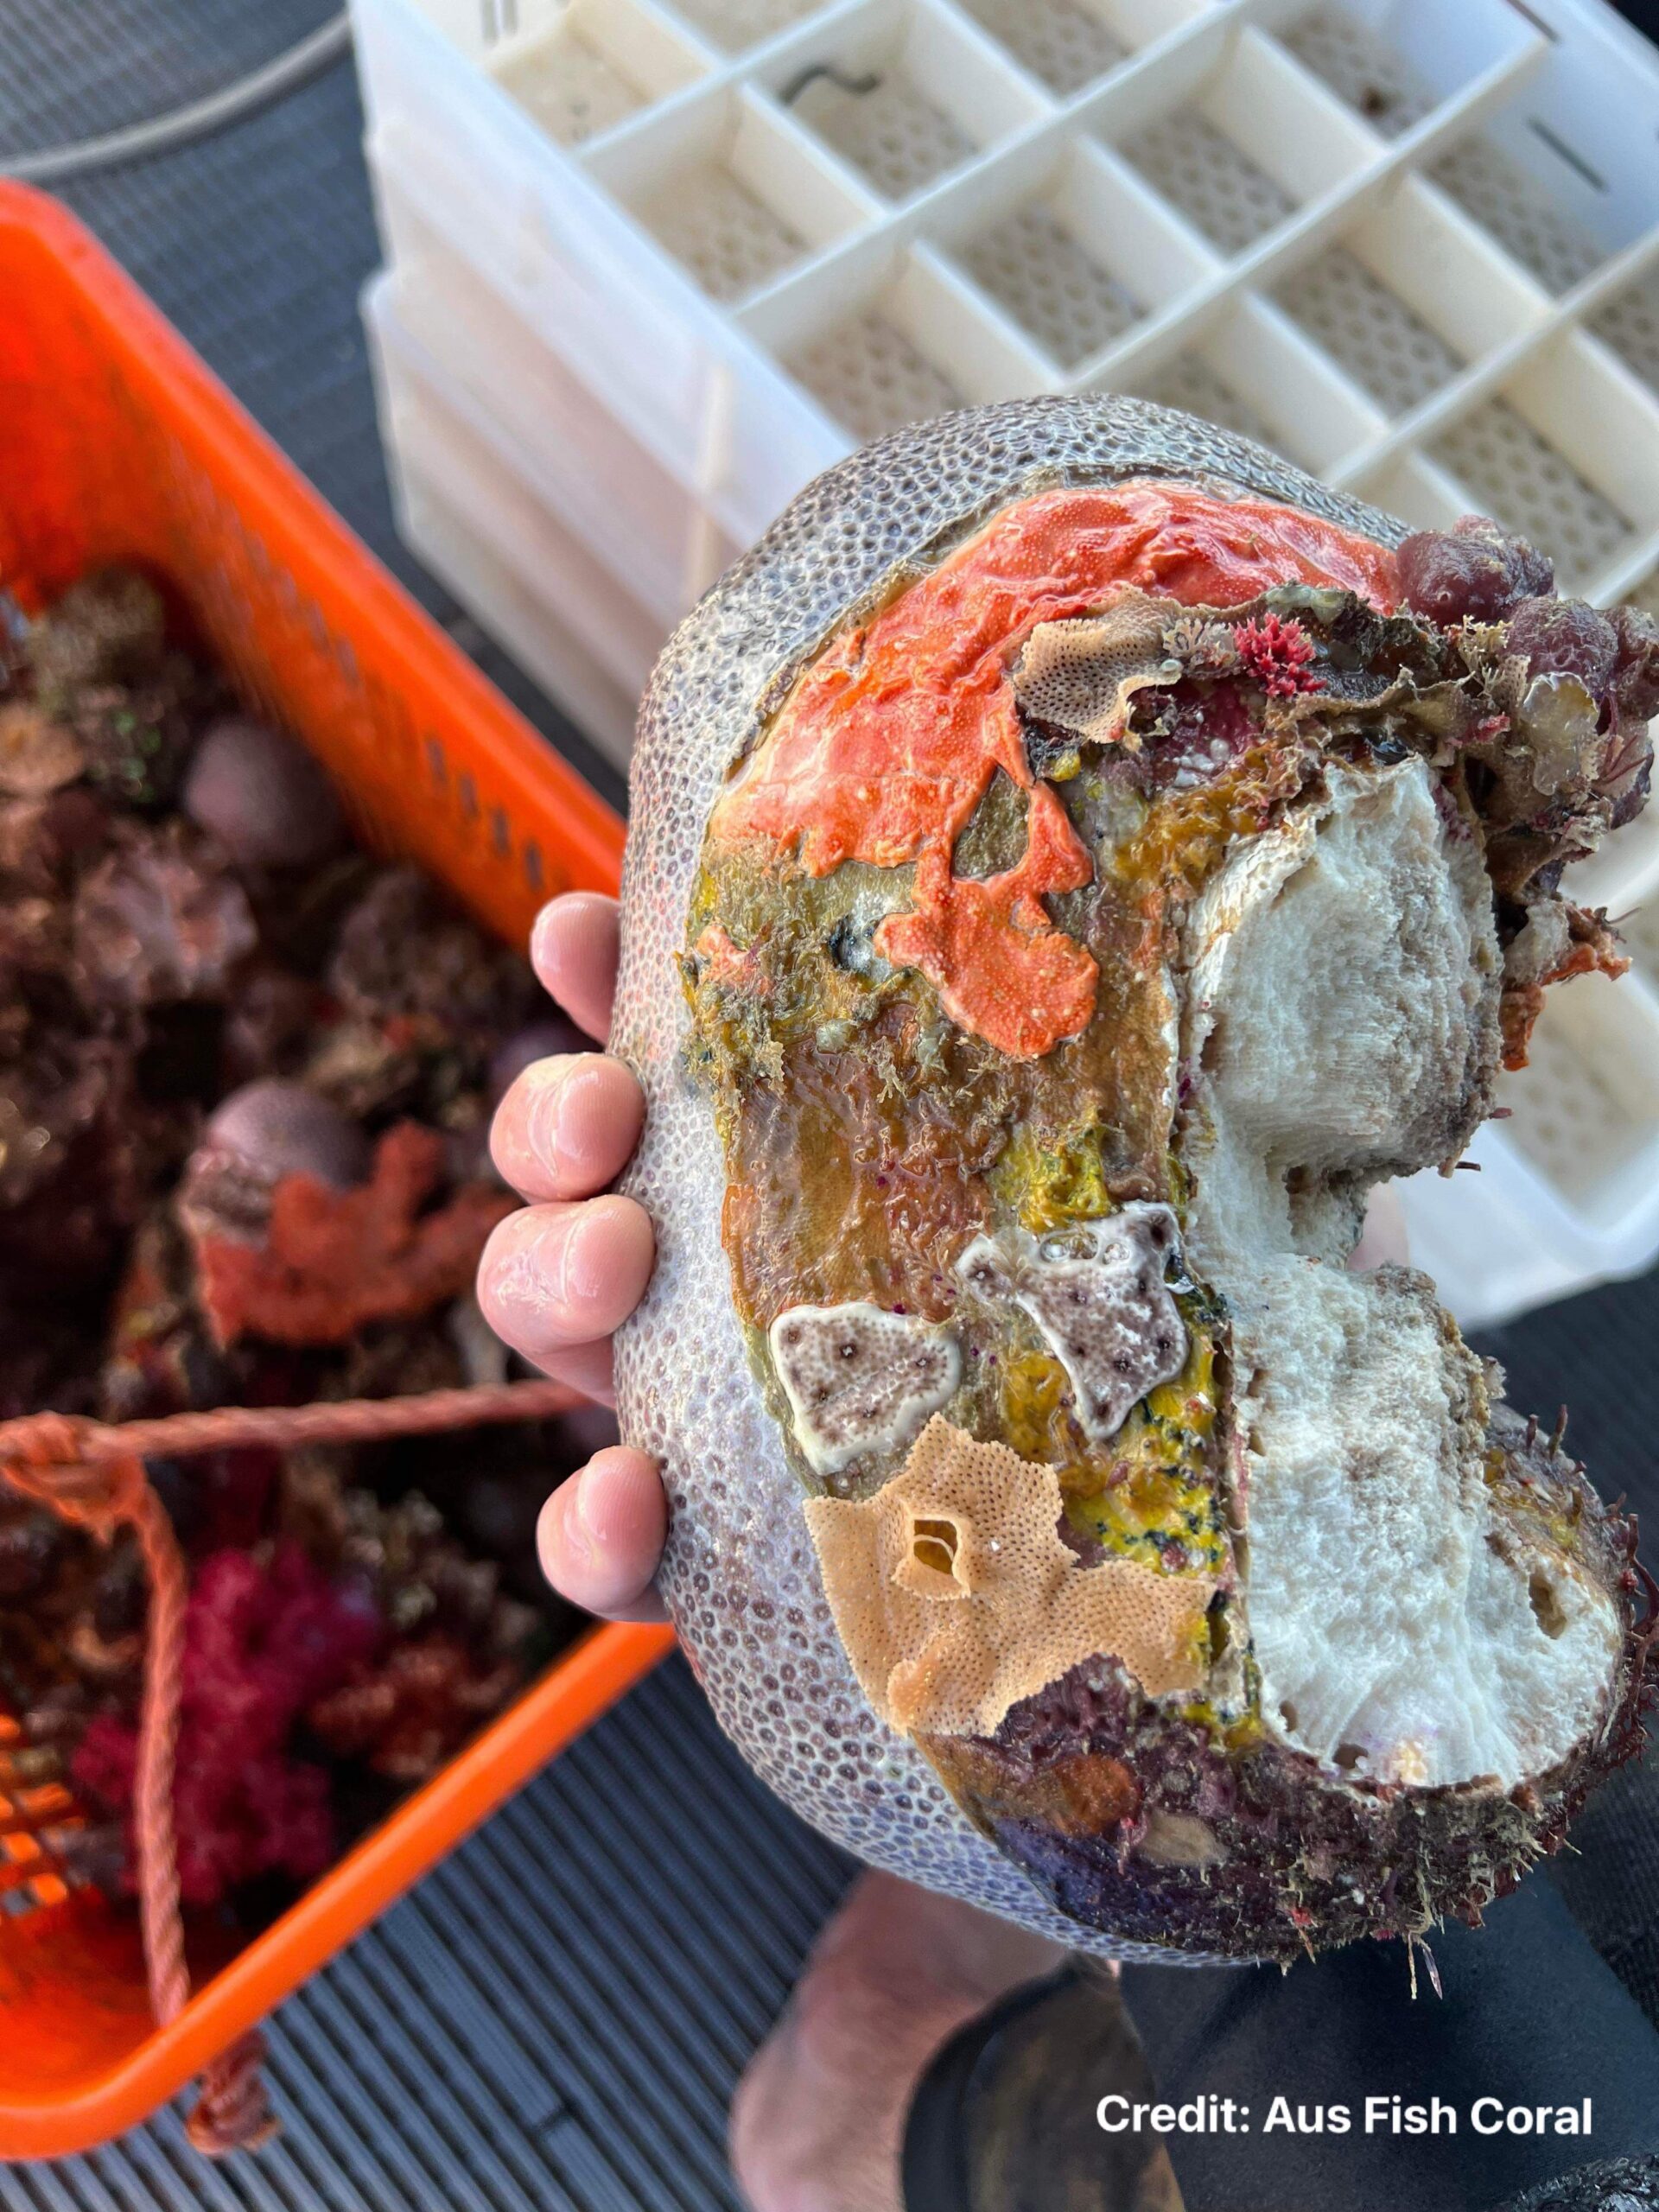
Sponges are next on the hit list, they don’t really like being moved around much and some species don’t like being exposed to air so it’s common to see them die off soon after they are brought home. This die-off is an immediate issue for the holding systems at the coral collection facility and for shipping. Sponges that you may encounter at home are bio-eroding sponges, the type that erodes the calcium carbonate skeleton of a coral and lives inside for protection against all the things that eat sponges in the ocean.
This wouldn’t be so bad if they didn’t make the skeleton like Swiss cheese which provides more places for pests to hide. So trimming down the excess rock and skeleton as much as possible allows you to scrape them away and gently brush on some pharmacy-strength 3% or 6% hydrogen peroxide to kill off the exposed sponges. Rinse the coral after a couple of minutes and the sponge should be dead. Any larger sponges on the outside can simply be scraped off. An old toothbrush is handy for getting rid of sponges too.

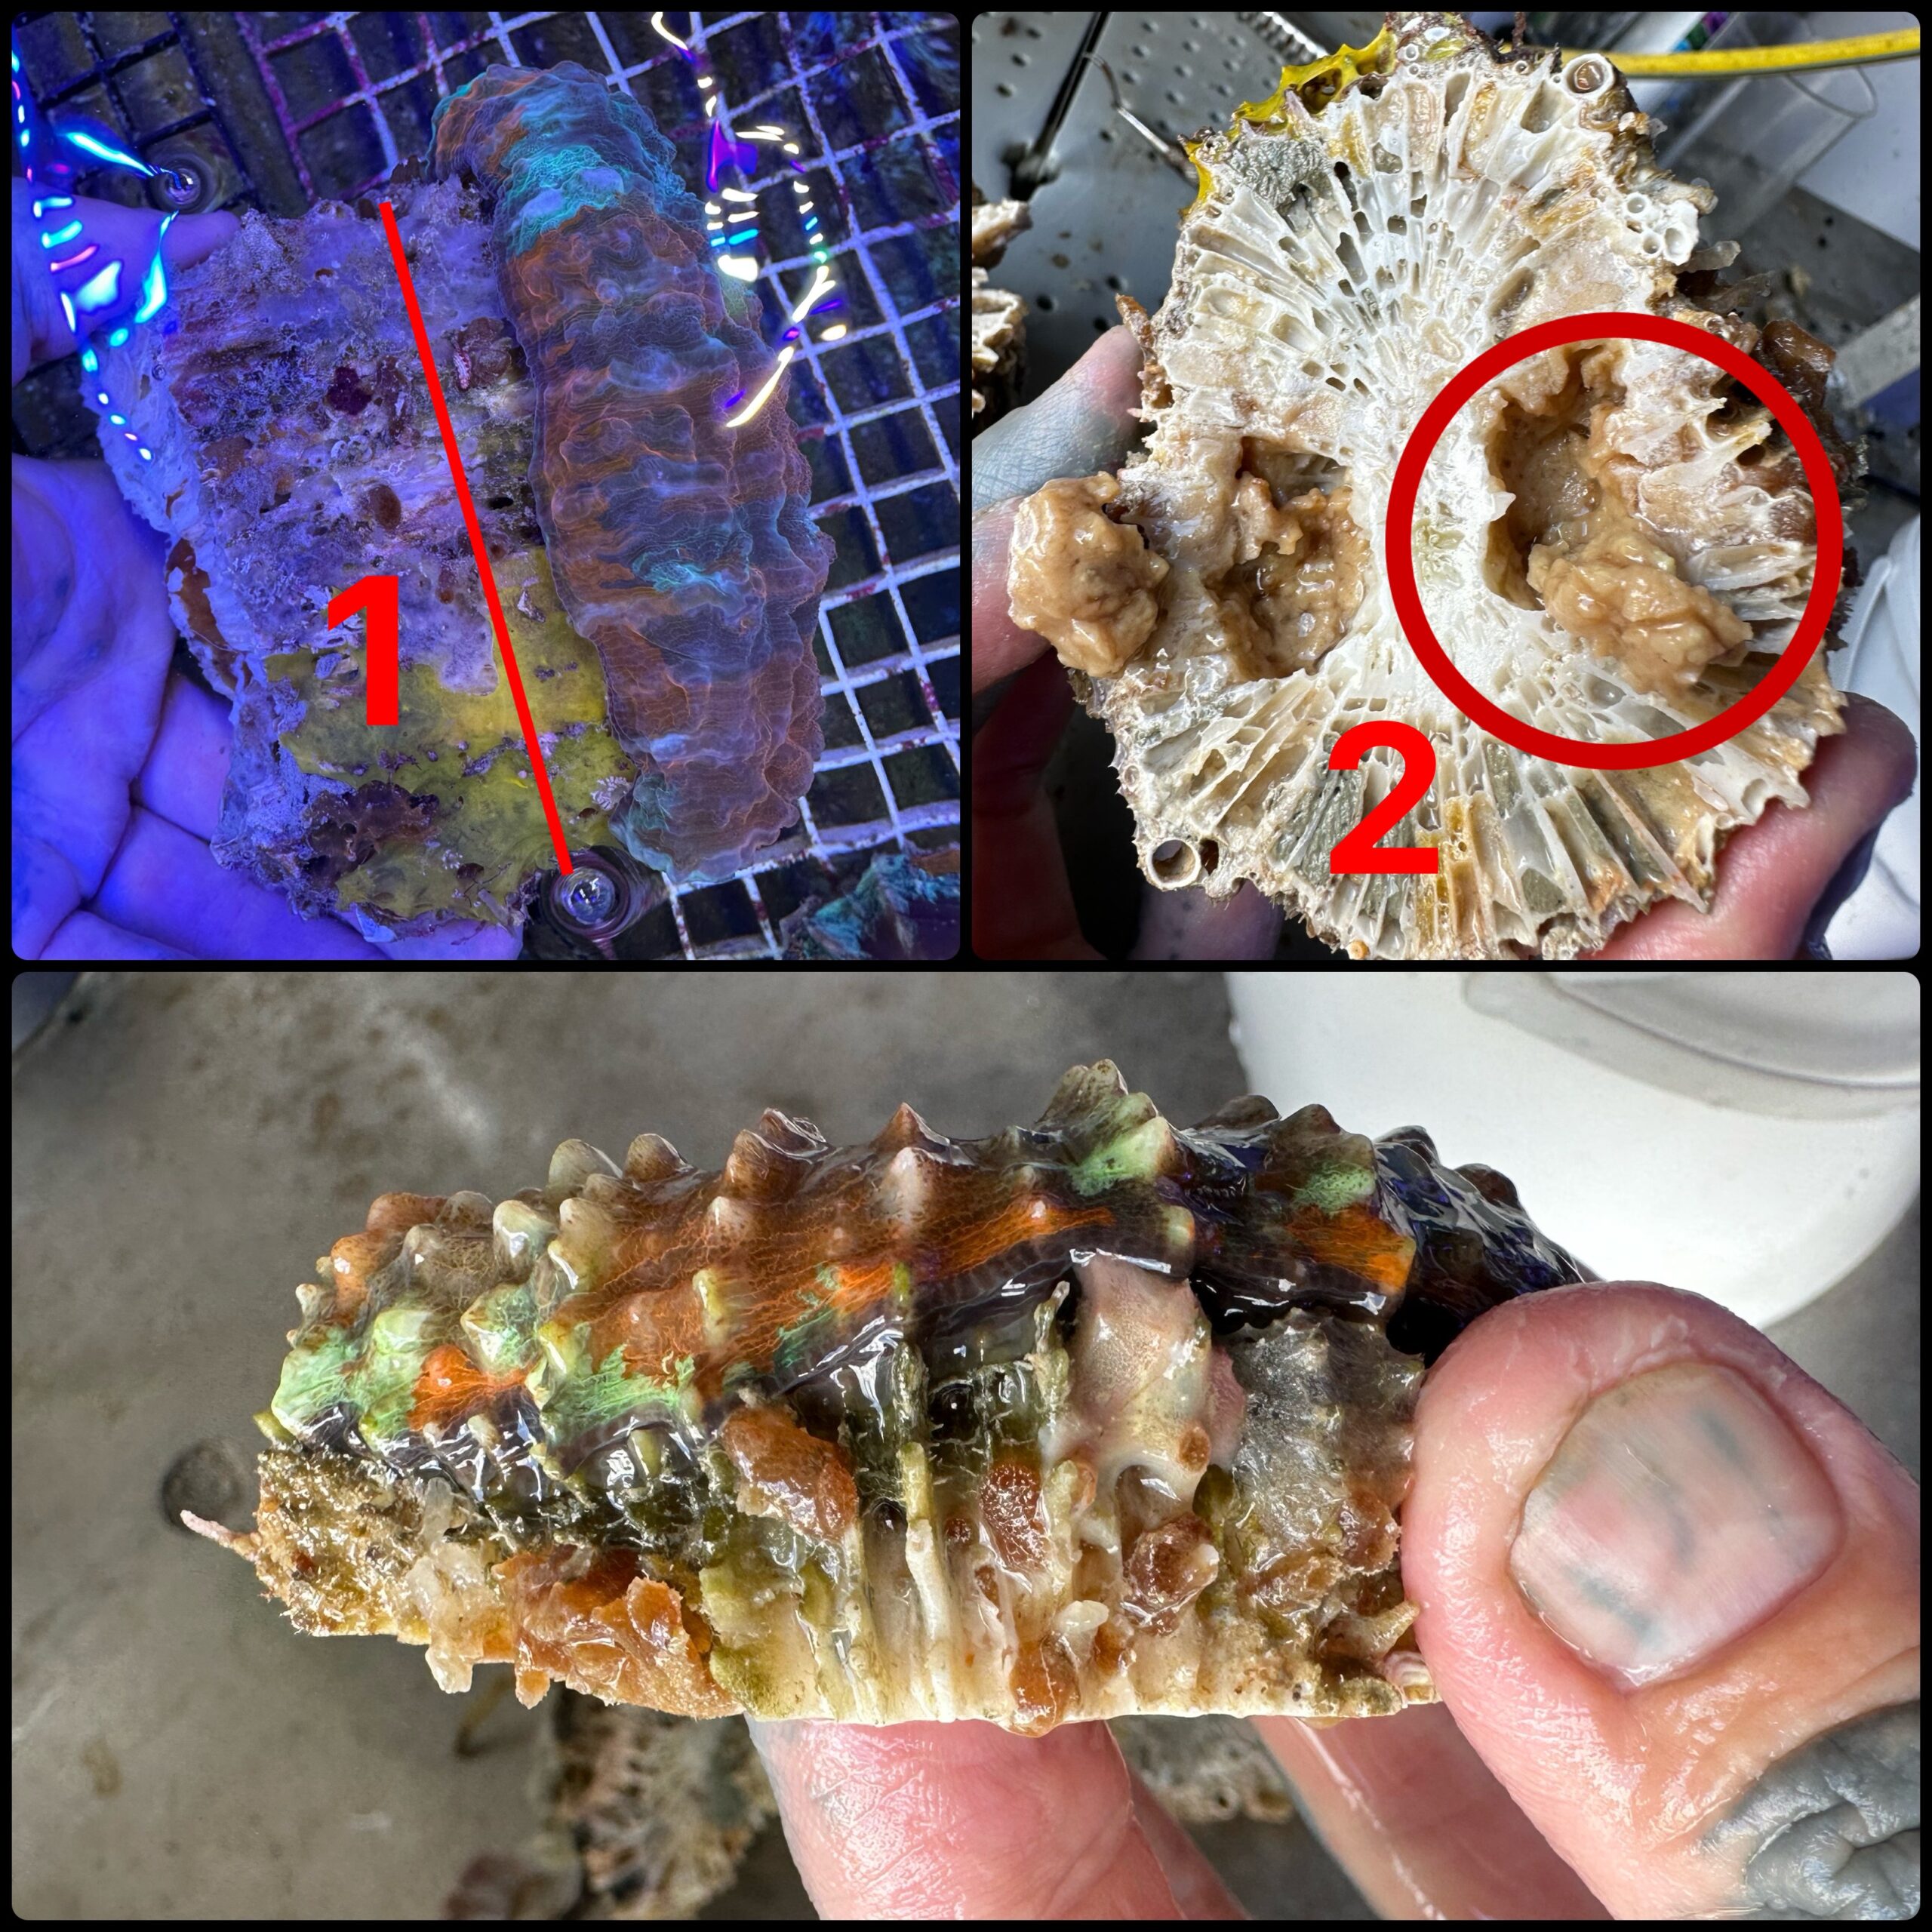
Lithophaga boring mussels are a coral pest that I’m hoping with more exposure will be as well known as Aiptasia! These bivalve mussels gain access to the skeleton under the coral tissue and use chemicals to break down a cavity in the hard skeleton structure. From inside this hole, they will make a smaller hole up to the tissue and irritate and damage the coral by either keeping this tissue wound open to feed on floating particles like micro plankton as well as coral slime. This constant damage and irritation from within causes a slow decline in health, often the coral will consume itself in an attempt to heal the wound. In the wild corals have access to more food, as does the Lithophaga inside, so the damage done is offset by a faster ability to recover.
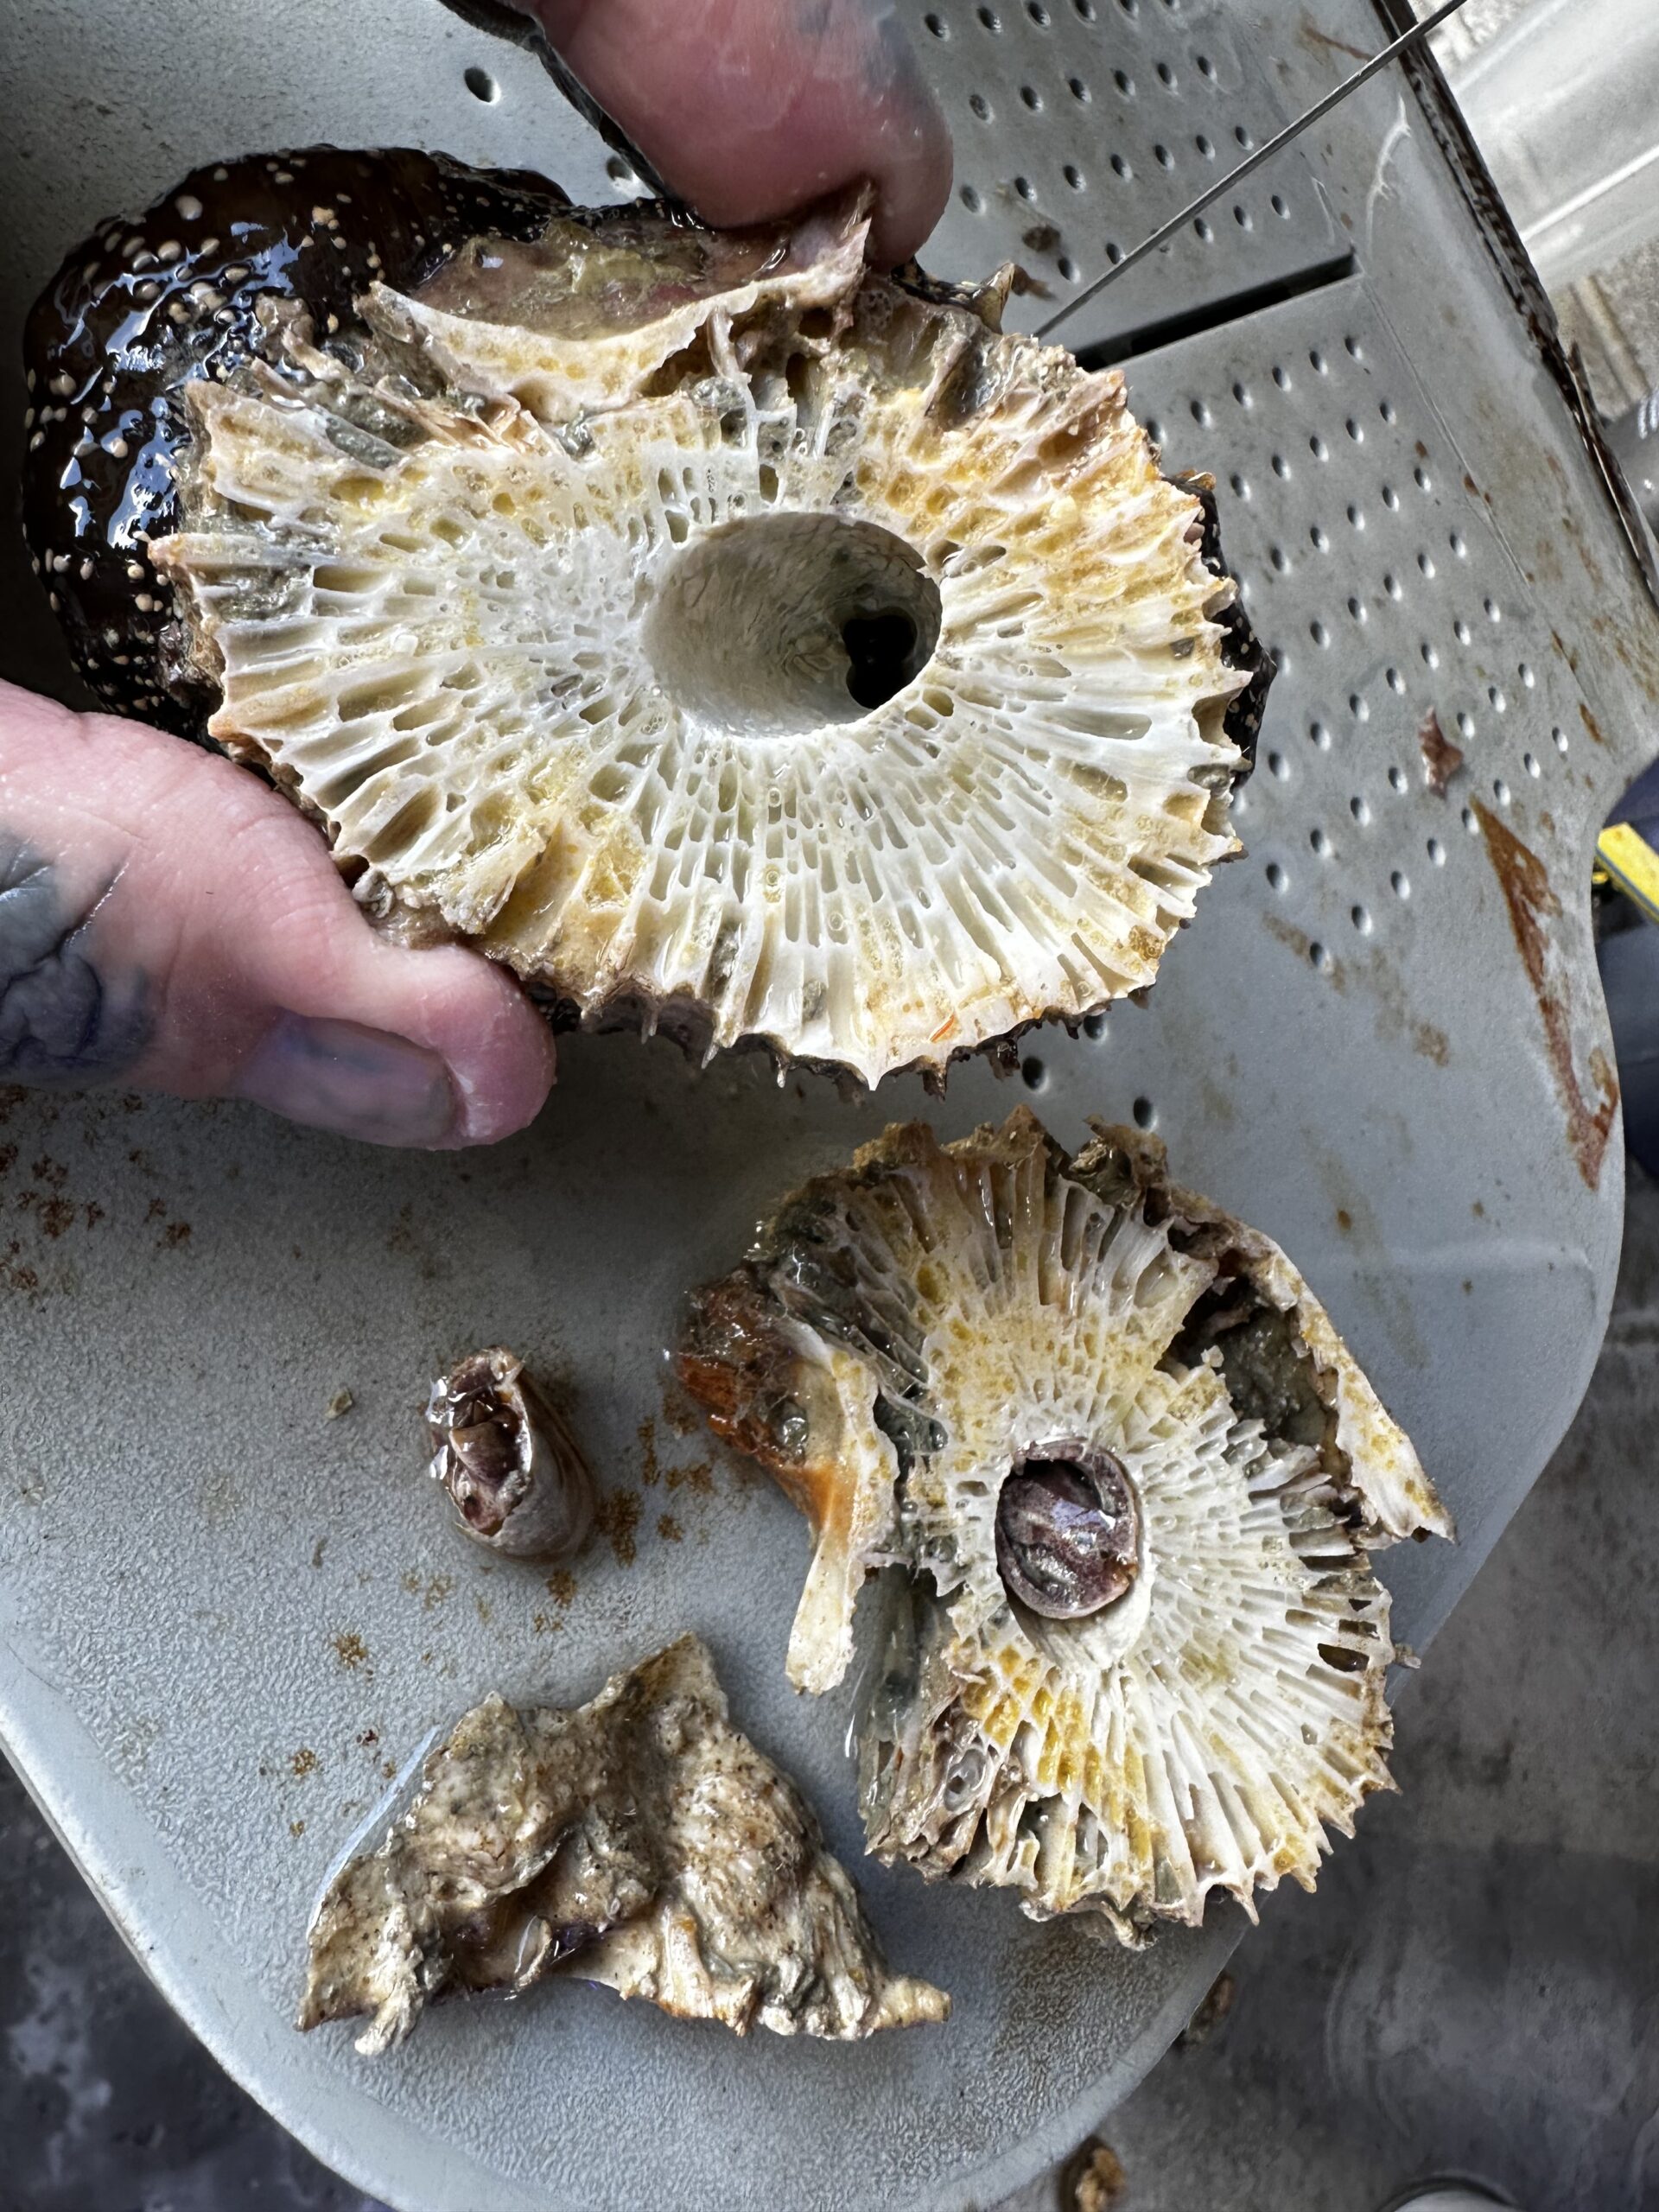
These Lithophaga mussels can be found in all corals and liverock at various sizes, however, the coral species at greater risk from the mussels being left inside are solitary polyp species such as Acanthophyllia deshayesiana (Desh) and Homophyllia australis (Scolly). Odd-shaped Scolly specimens are often the result of Lithophaga damage as the Scolly heals itself on either side of the wound and allows the Lithophaga to reach the surface.
Removing them is again done by a very close skeleton removal. By now some of you might be thinking a little about some home fragging tools and skill upgrades for ensuring your corals are properly cleaned. I promise you now that having success with pest removal is largely tied to removing anything that isn’t coral or directly needed by the coral.

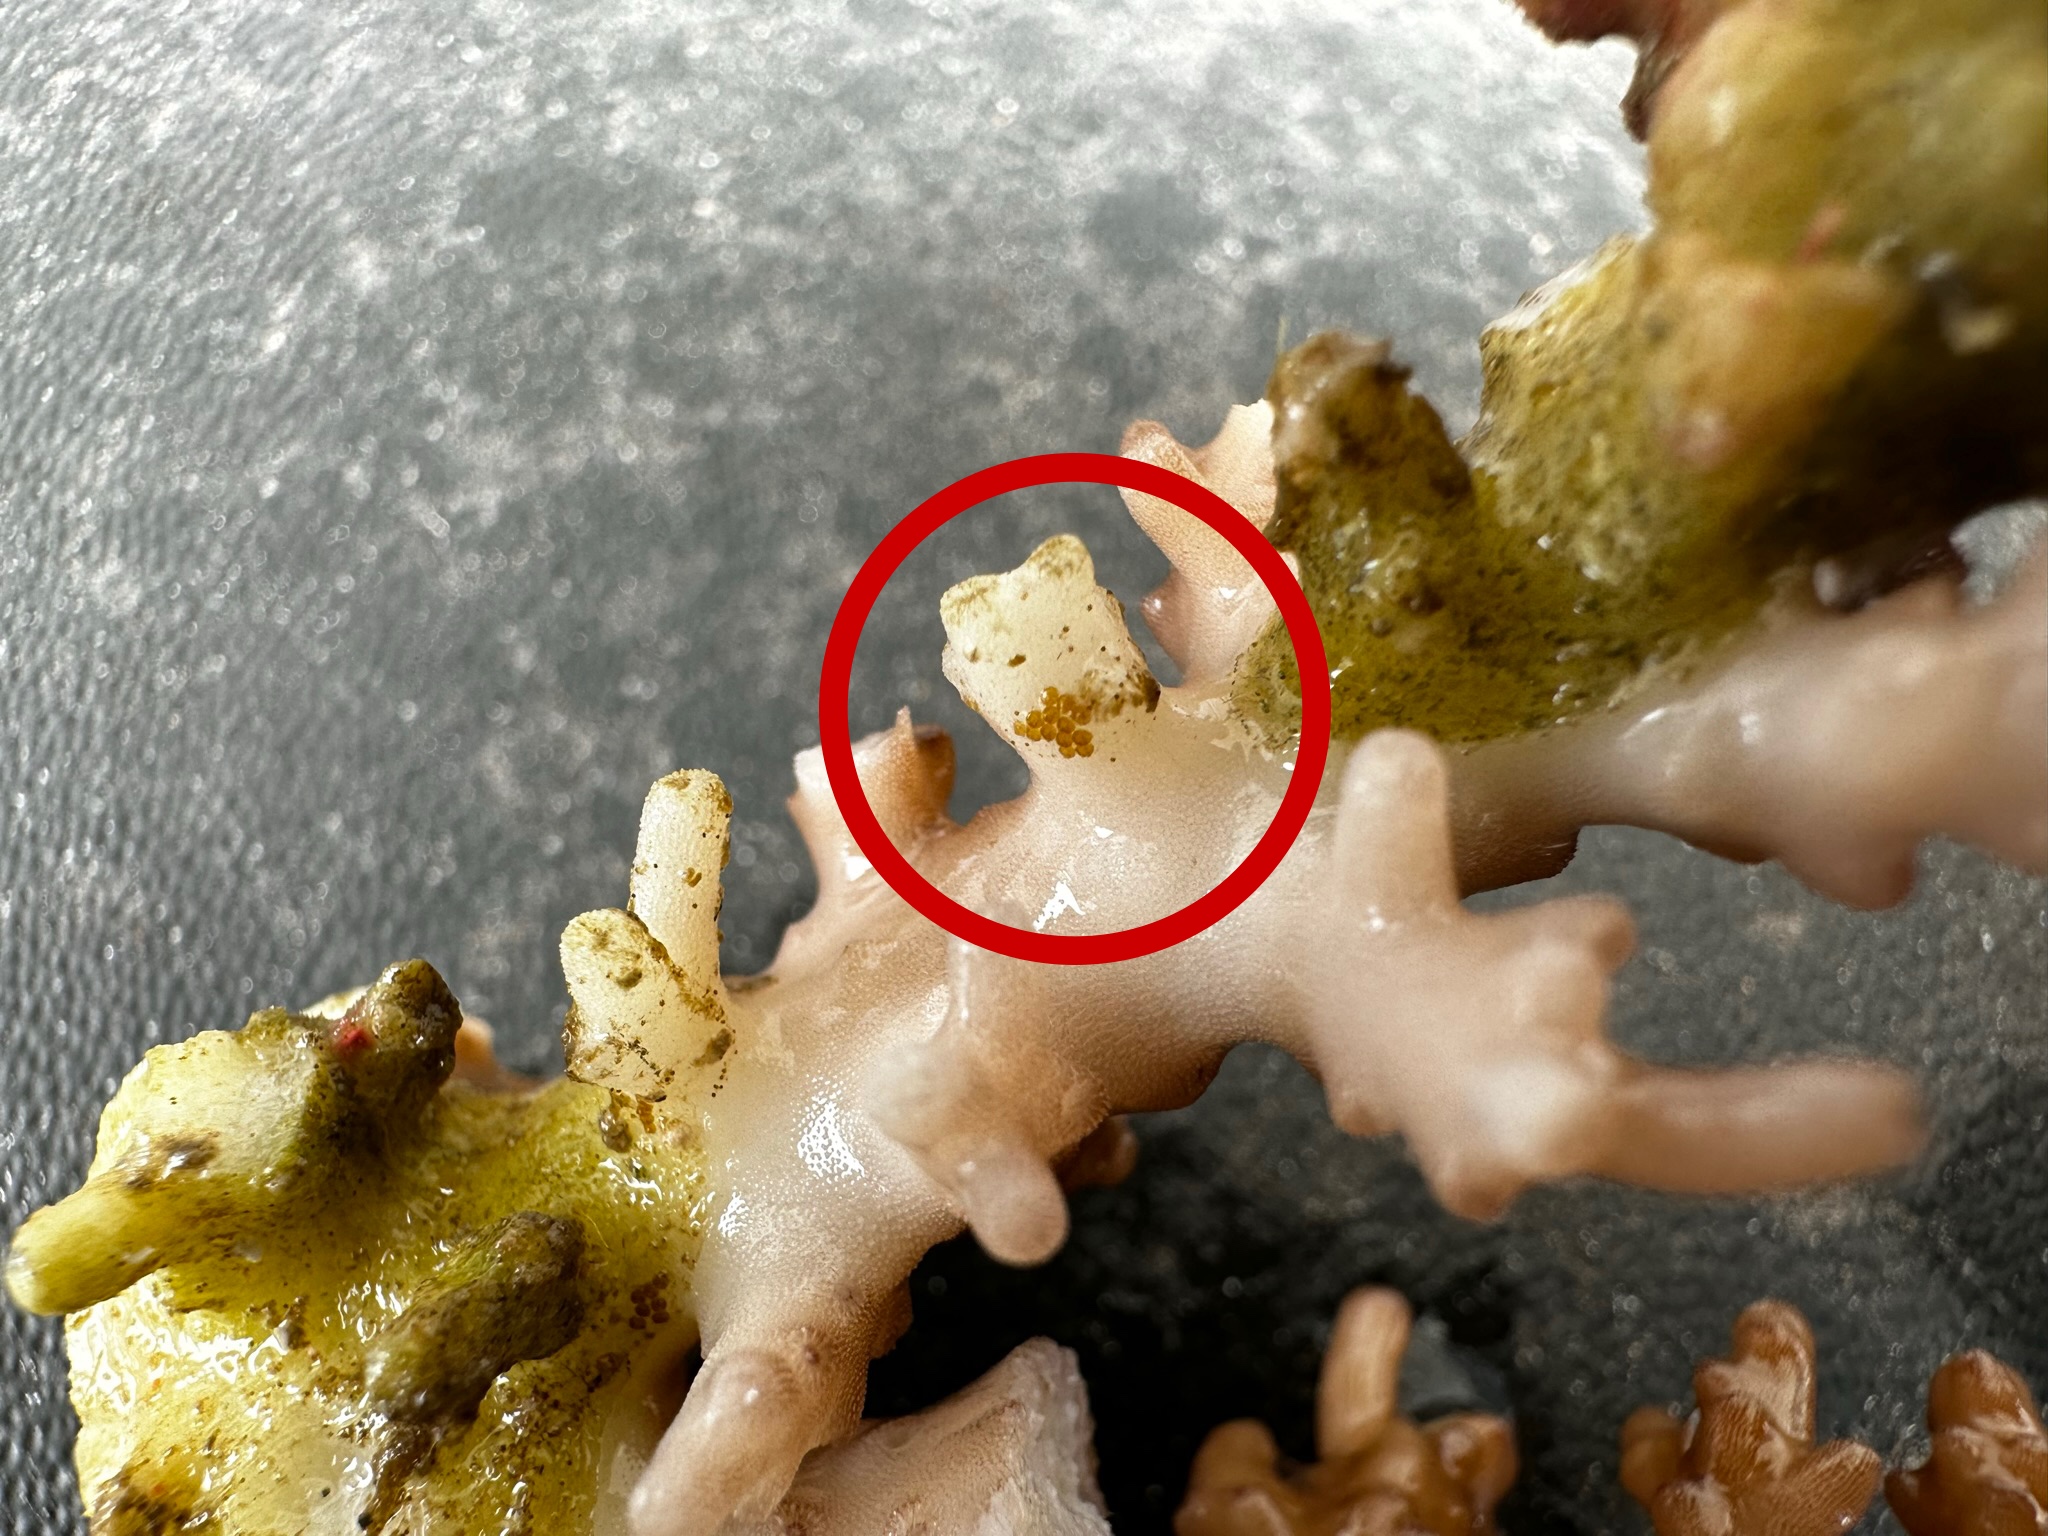
Acropora Eating Flatworms (AEFW) on new colonies of wild Acro with rock attached to the base of the colony is a prime location for AEFW to lay eggs. Remove the rock, remove all dead Acro sections if there is any and you can even break the colony up to make sure no dead patches are hidden.
AEFW will normally lay eggs on dead Acro skeleton or base rock directly beside living coral tissue, so removing that dead skeleton greatly decreases the risk of introducing AEFW.
So to round this out and recap, there are many more pests and other organisms that can or will proliferate quickly if they aren’t removed such as macro or microalgae, plus a whole host of other pests that can slowly and silently damage your precious corals. Coral pest dips are a great tool for cleaning new corals but always remember to remove anything that isn’t live coral or directly required by the coral tissue for the best chance of that coral thriving in your reef. From wild collection to the wholesaler I think a pretty good job is being done at cleaning up corals but taking the time to check over your corals and be sure they are clean and free of excess rock will only benefit you in the long run.